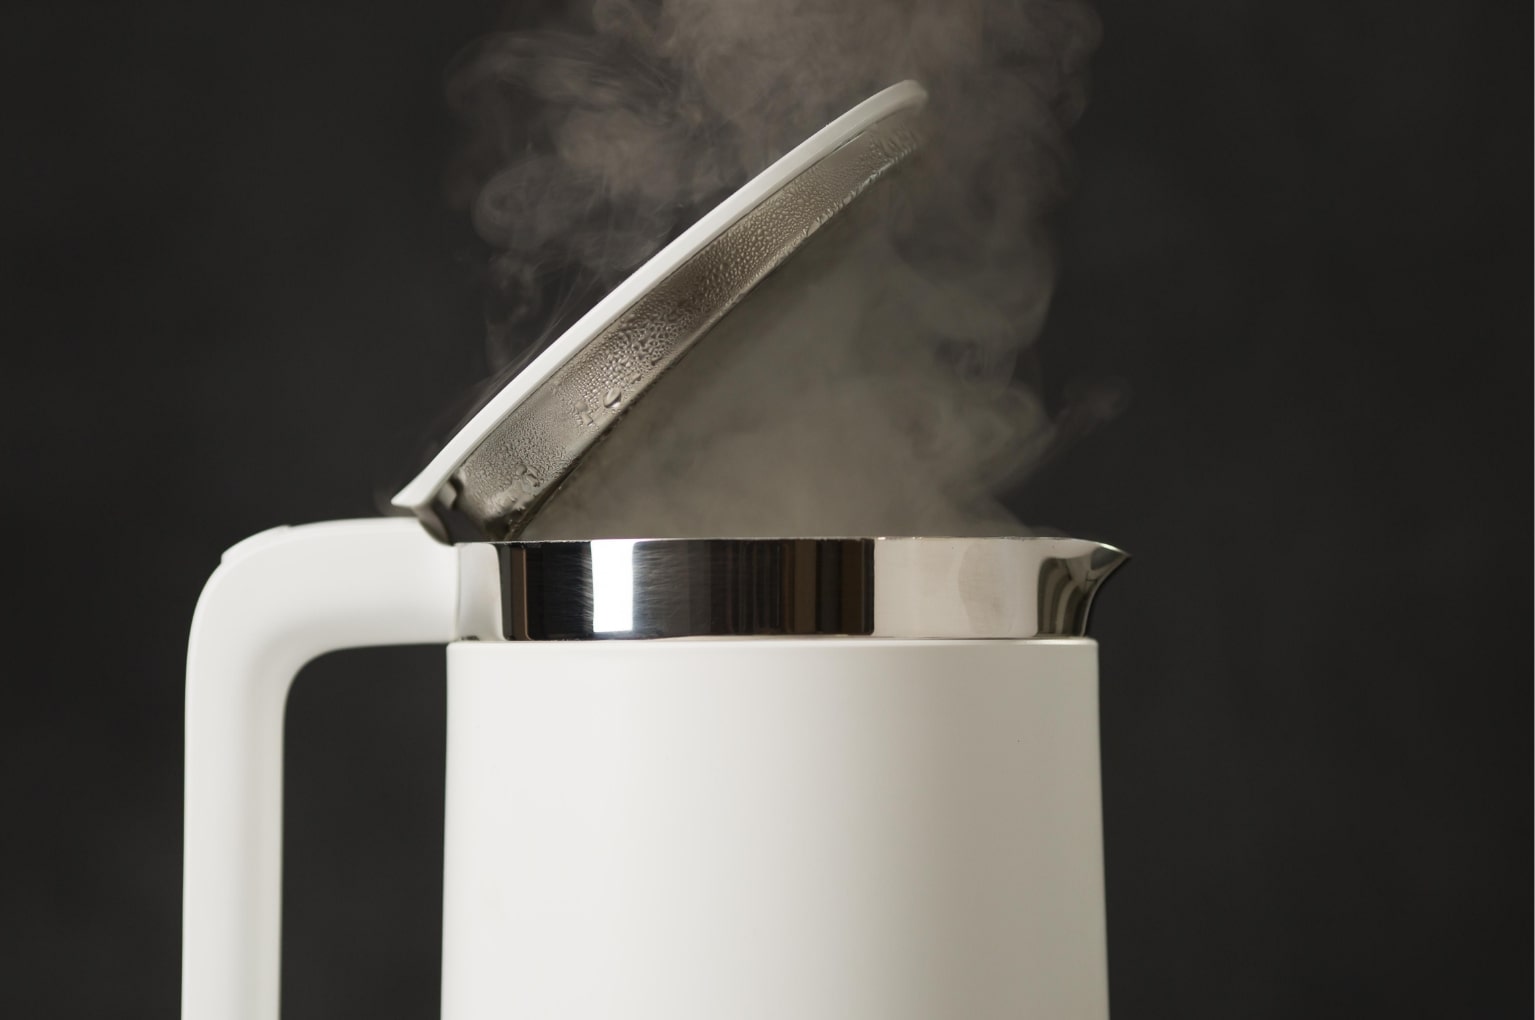
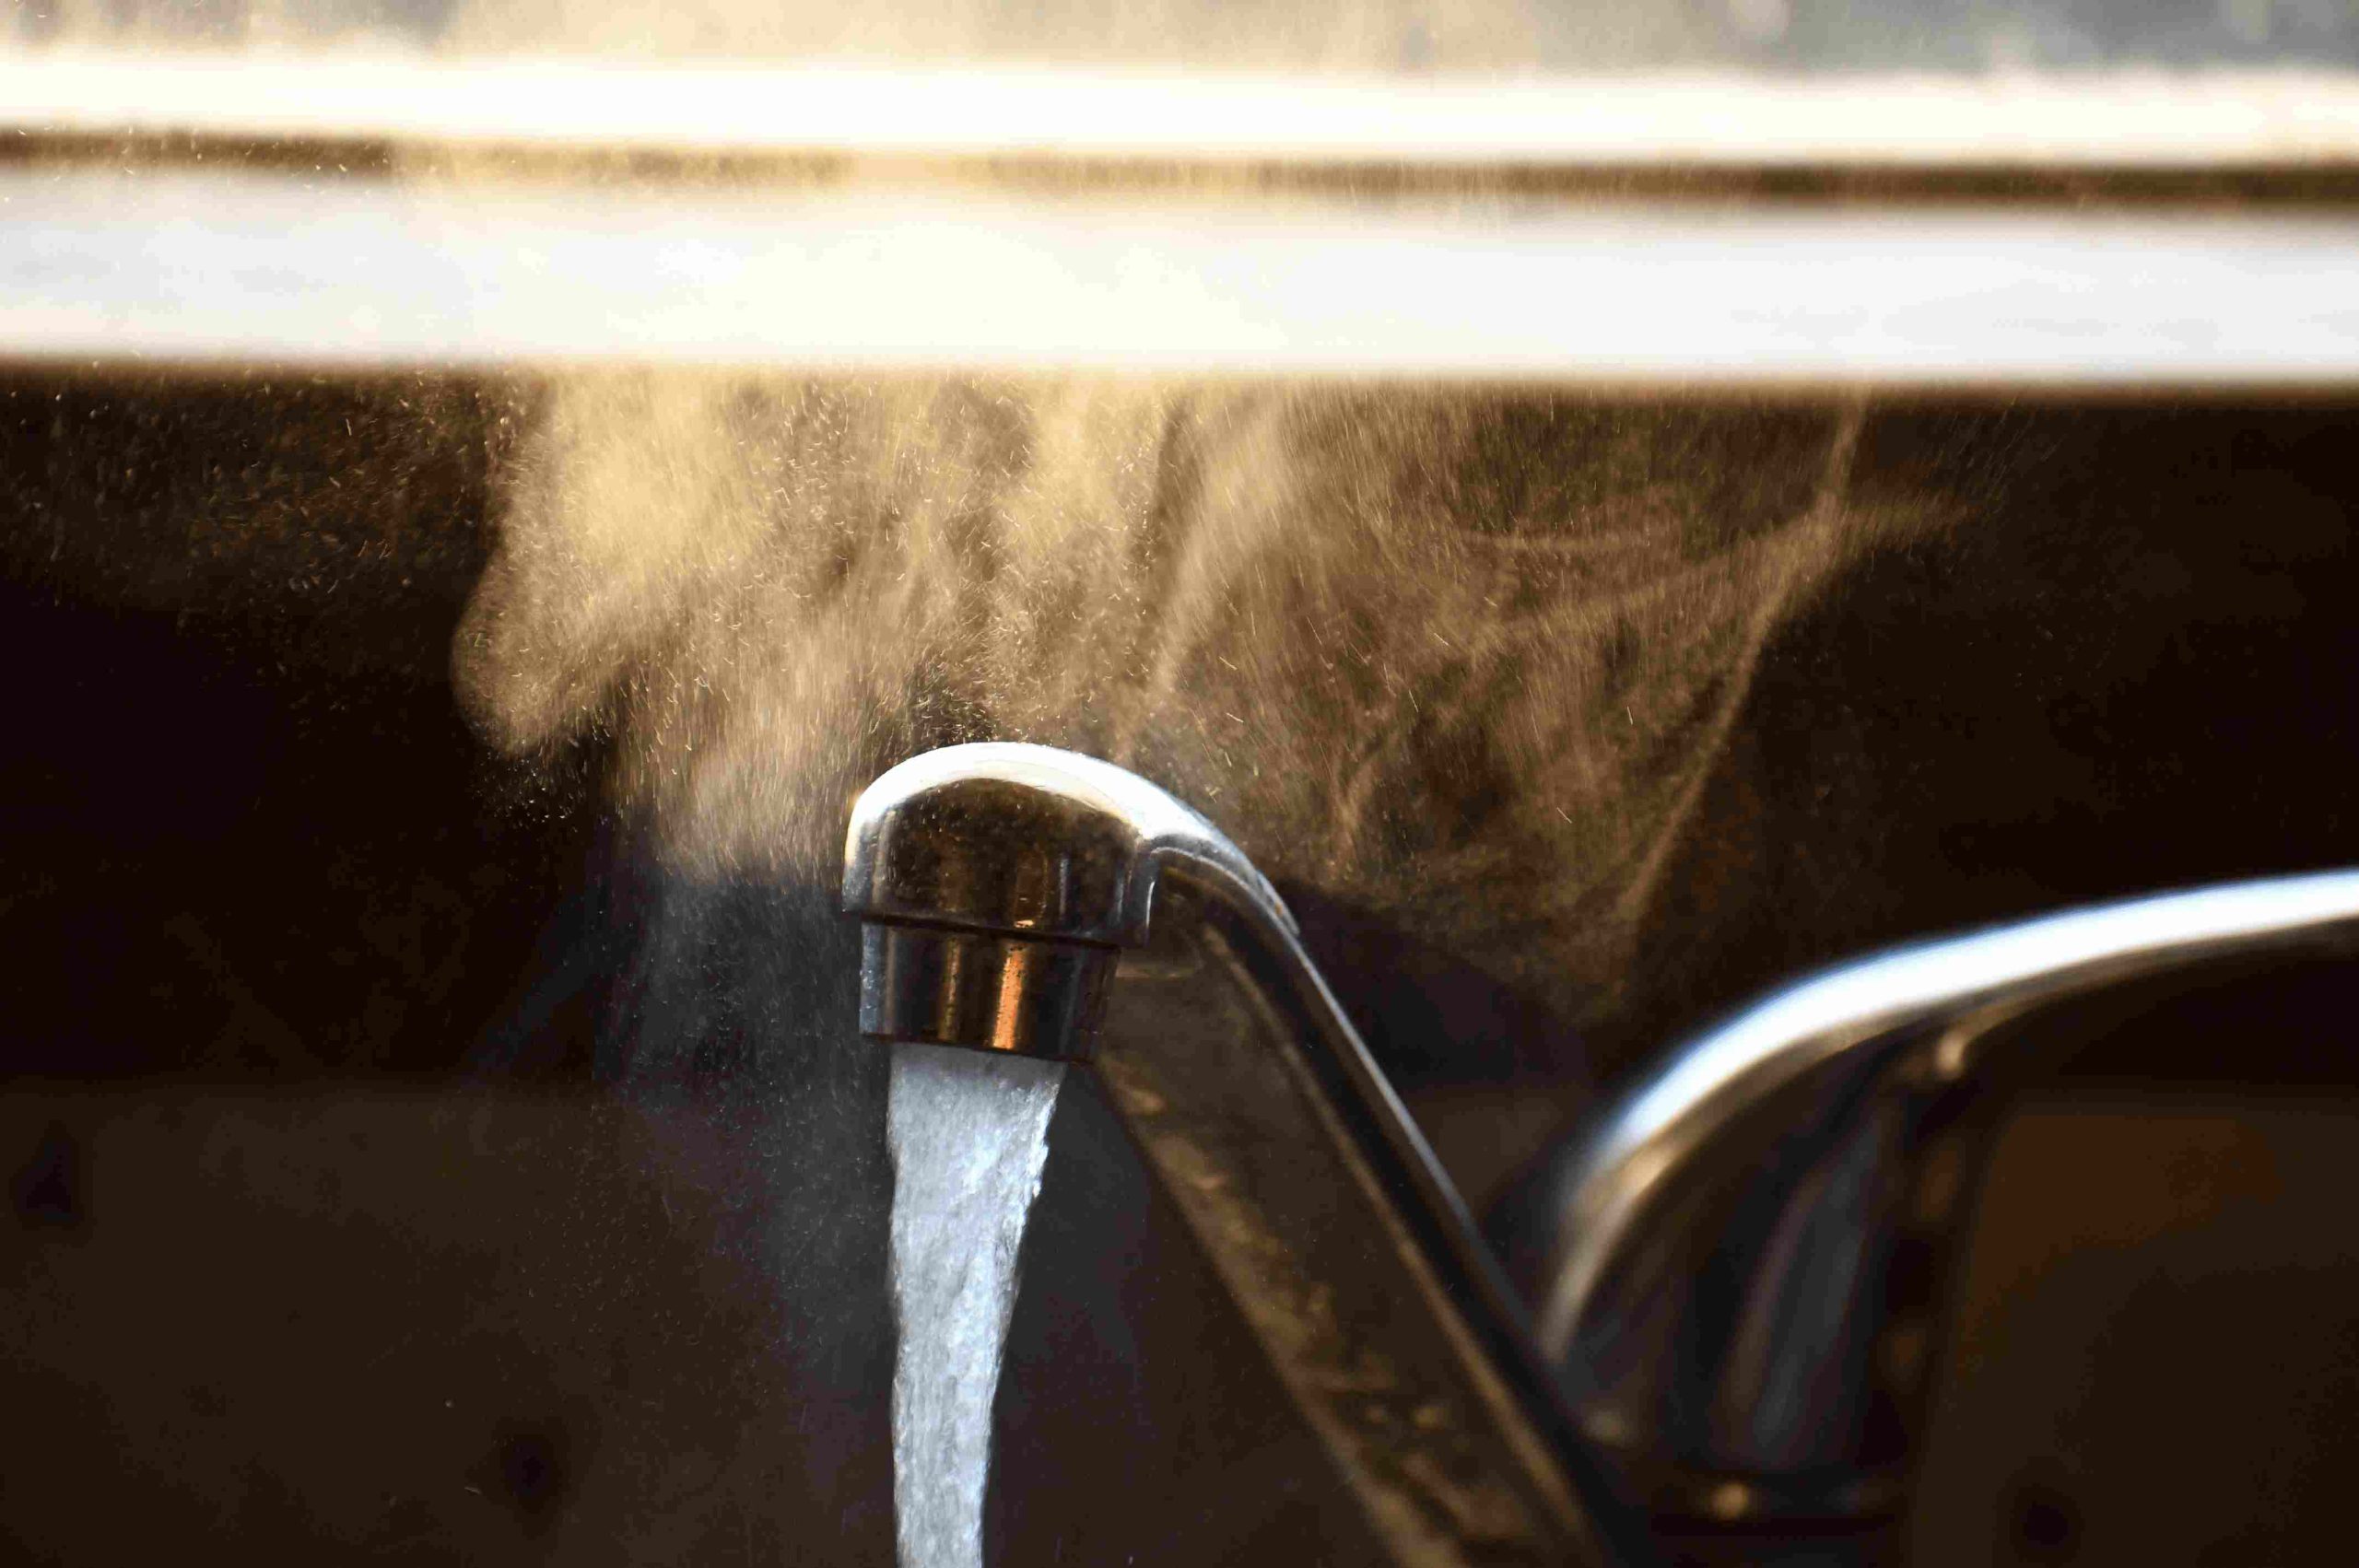
At Rayne Water, we understand the importance of ensuring the safety and quality of your drinking water. Nitrates in drinking water, a common concern, can have significant implications on both health and the environment.
In this comprehensive guide, we delve into the various aspects of nitrate contamination – its causes, health risks, and the steps you can take to mitigate these risks.
What Are Nitrates in Water?
Nitrates are compounds found naturally in the environment but can reach harmful levels due to human activities. They are composed of nitrogen and oxygen (NO₃⁻) and are a part of the larger nitrogen cycle.
While nitrates occur naturally in soil, water, and the atmosphere, their levels can be significantly increased by human activities such as agriculture and industrial processes.
Chemical Properties of Nitrates
Nitrates, key components in various water sources, possess a unique molecular structure where a central nitrogen atom is bonded to three oxygen atoms.
This structure bestows nitrate ions with a negative electrical charge, significantly influencing their behavior and interaction in aquatic environments.
One of the defining physical characteristics of nitrates is their high solubility in water, which makes them common and persistent contaminants in water systems.
Natural Occurrence of Nitrates:
In nature, nitrates play a role in the nitrogen cycle, an essential process for life on Earth. They are commonly found in different environmental mediums, including soil and water.
The presence of nitrates in these natural habitats is a normal part of ecological processes, contributing to various biological functions.
Anthropogenic Sources of Nitrates:
Human activities substantially contribute to the increase in nitrate levels, particularly through the use of fertilizers in agriculture and the production of industrial waste.
The application of nitrogen-rich fertilizers in farming is a significant source of nitrate contamination in water bodies.
When these fertilizers are used in excess or improperly managed, runoff can carry these nitrates into nearby streams, rivers, and groundwater, leading to elevated levels of nitrate contamination in these water sources.
Health Impacts of Nitrate Contamination
Let’s explore how nitrate contamination in drinking water can cause various health issues, affecting vulnerable groups and leading to long-term health risks.
Nitrate-Related Health Concerns
Nitrate contamination in drinking water is linked to various health concerns. High levels of nitrates, especially when combined with other agrochemicals, can increase the risk of several types of cancer, such as colorectal, stomach, bladder, and various pediatric cancers.
The process involves the conversion of ingested nitrates into carcinogenic compounds in the body.
Certain groups, like infants, pregnant women, and the elderly, are more susceptible to the adverse effects of nitrate contamination.
Infants are particularly at risk of developing methemoglobinemia, also known as blue baby syndrome, where nitrate interferes with the blood’s ability to carry oxygen.
Long-Term Health Implications
Long-term exposure to high levels of nitrates in drinking water can lead to chronic health conditions. It’s essential to monitor water quality and implement preventative measures to mitigate these risks. This includes understanding and managing the sources of nitrate contamination.
Nitrates, primarily stemming from human activities, can significantly impact water quality.
A large portion of nitrate contamination arises from agricultural practices. Fertilizers, both organic and inorganic, used to enrich soils, often contain high levels of nitrates.
These nitrates can leach into groundwater or run off into surface water sources, thereby contaminating drinking water supplies. This problem is particularly evident in agricultural regions.
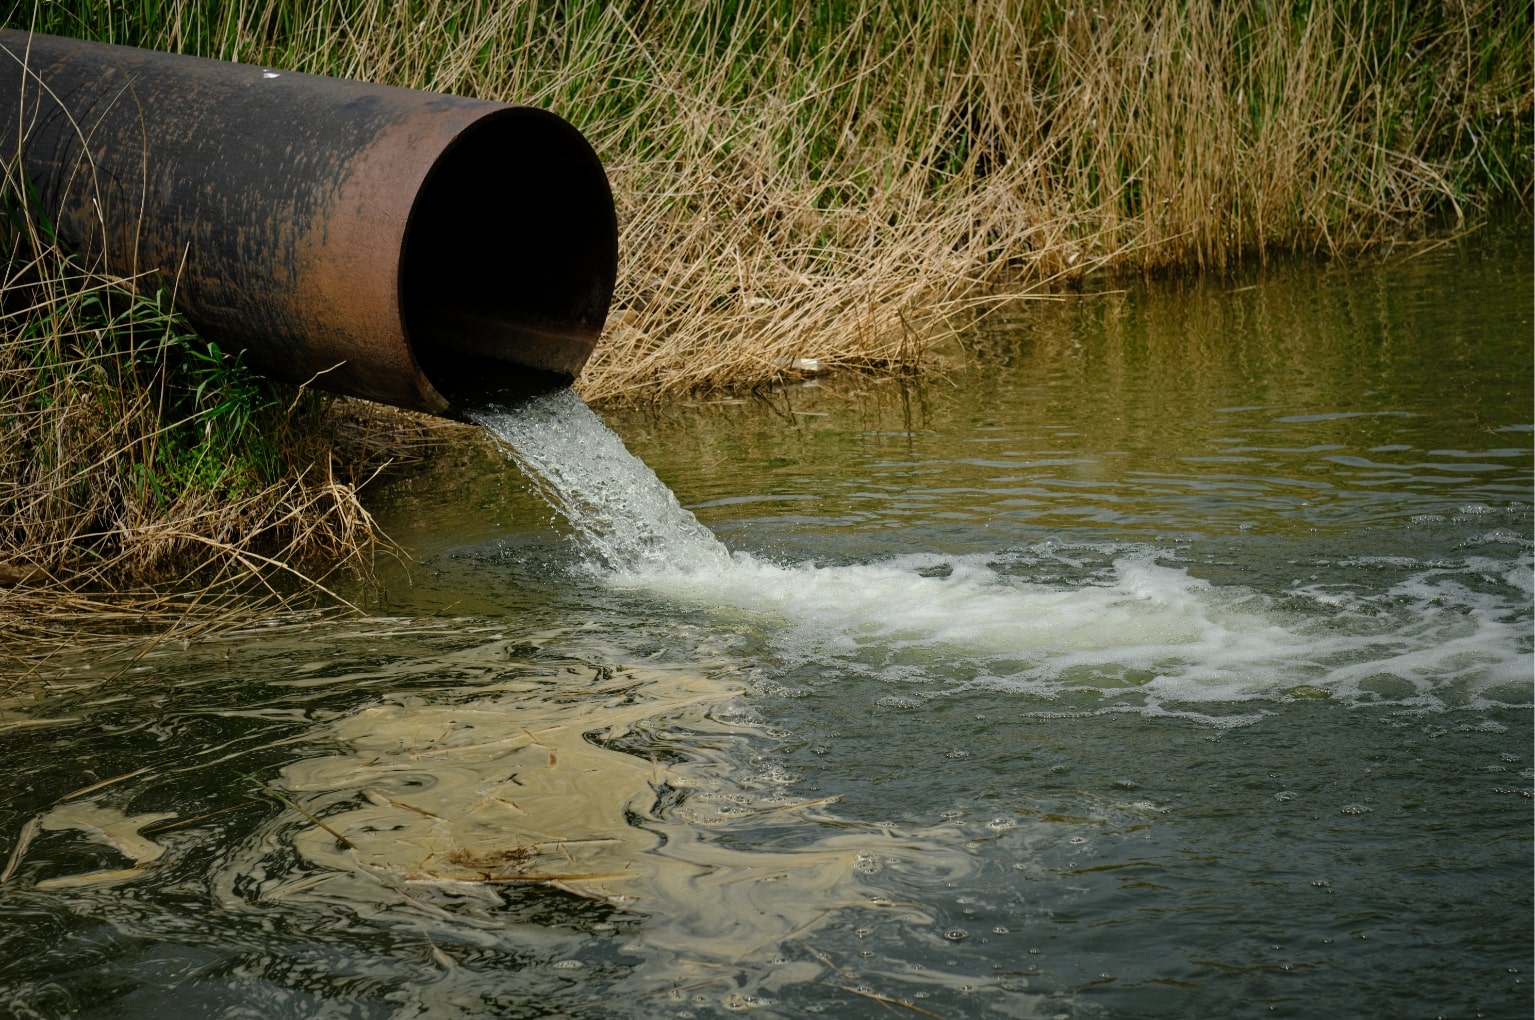
Besides agriculture, industrial processes contribute to nitrate levels in water.
Discharges from factories and wastewater treatment plants can introduce significant amounts of nitrates into water systems.
This contamination is not just limited to rural areas; urban settings are also affected, as seen in cities across the United States where elevated nitrate levels have been detected in drinking water systems.
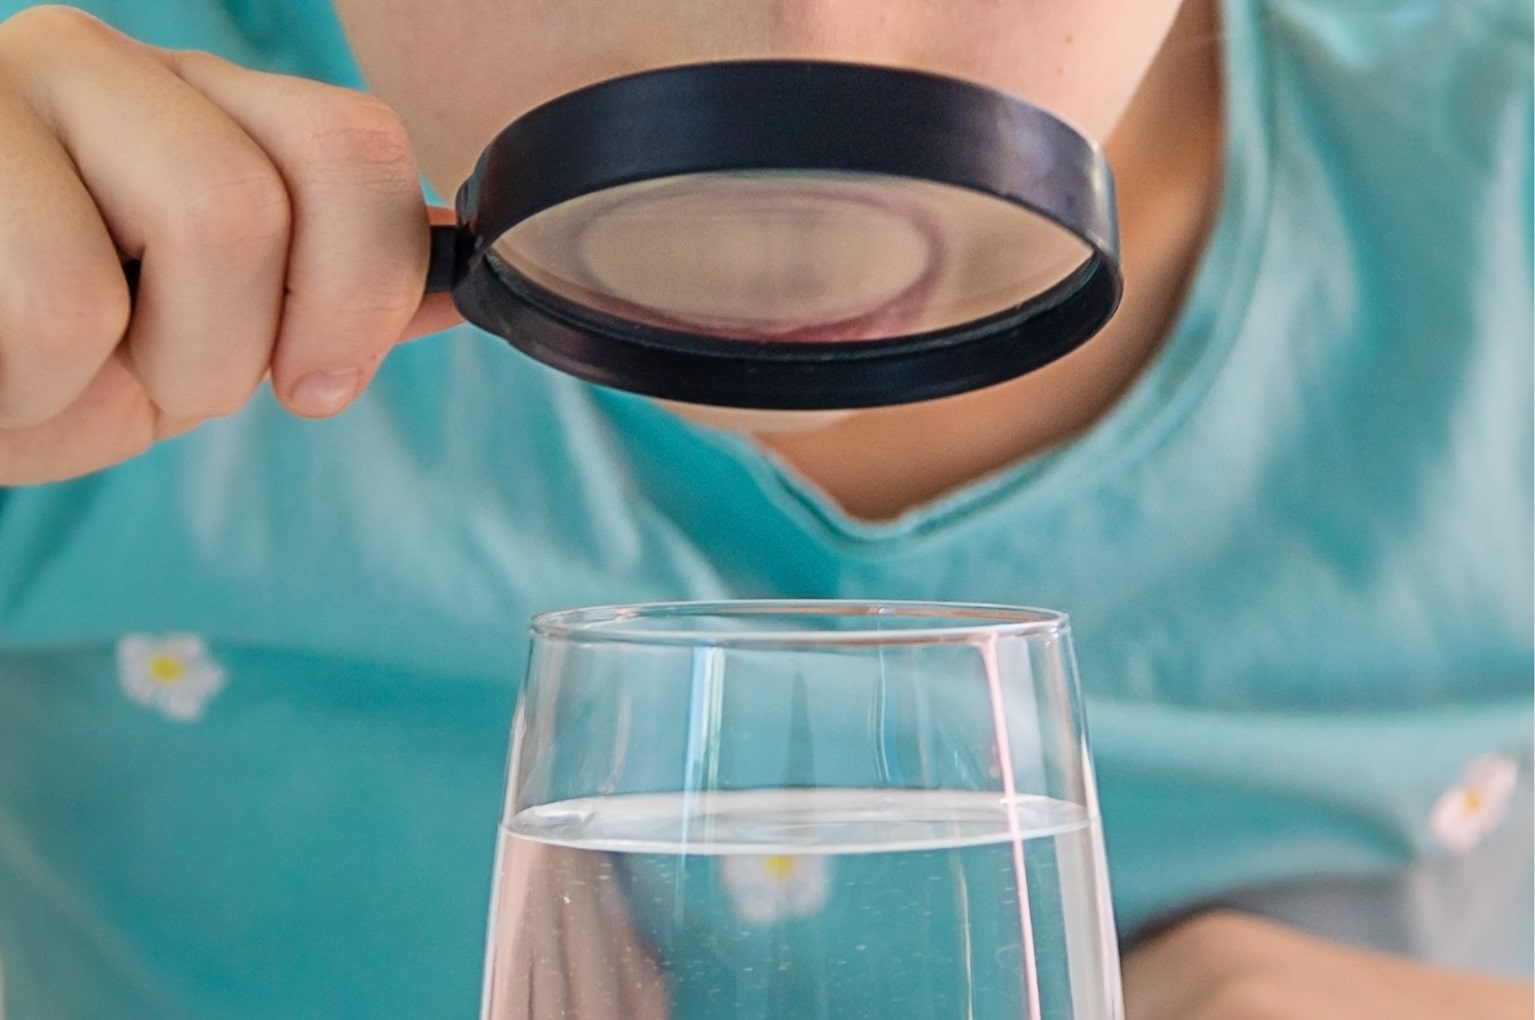
Understanding how to test and detect nitrates in water is vital for maintaining water safety and quality.
For individual households, especially those using well water, home testing kits provide a convenient way to monitor nitrate levels. These kits offer a quick and cost-effective method to detect nitrates in water.
However, for more accurate and comprehensive analysis, laboratory testing is recommended. Labs can provide detailed results and are essential for testing large water systems.
Regular testing of water sources is crucial to ensure safe drinking water. This is especially important in areas prone to nitrate contamination, like agricultural regions.
For private wells, annual testing is advisable, while public water systems are regularly tested under regulatory requirements.
At Rayne Water, we understand that water contaminants can jeopardize our health and environment. Whether you need a residential water softening system for hard water problems or a water filtration treatment system for your commercial use, we have it all.
Regulations and Safe Nitrate Levels
Navigating the regulations and understanding safe nitrate levels in drinking water is key to ensuring public health and compliance with legal standards.
In the United States, the Environmental Protection Agency (EPA) sets standards for safe drinking water. The Maximum Contaminant Level (MCL) for nitrates, set by the EPA, is 10 mg/L.
This standard is in place to protect against health risks, particularly for vulnerable populations like infants and pregnant women.
Regulatory agencies at both federal and state levels play a crucial role in monitoring water quality and enforcing standards. These agencies conduct regular testing and oversee compliance with legal requirements to ensure the safety of public water systems.
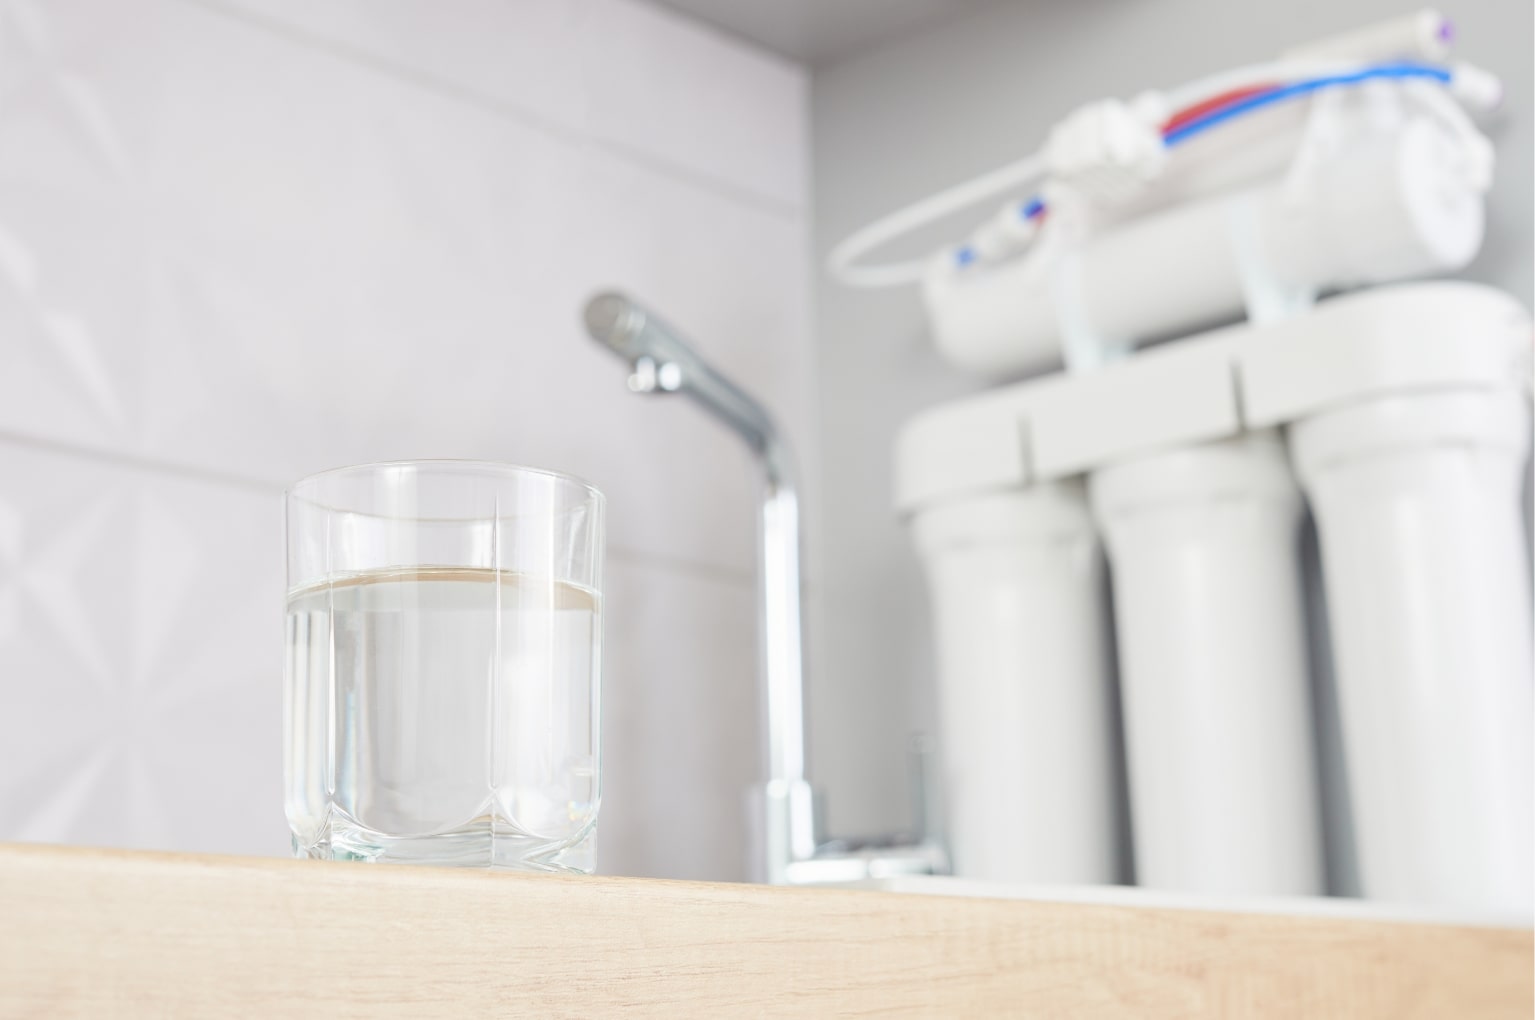
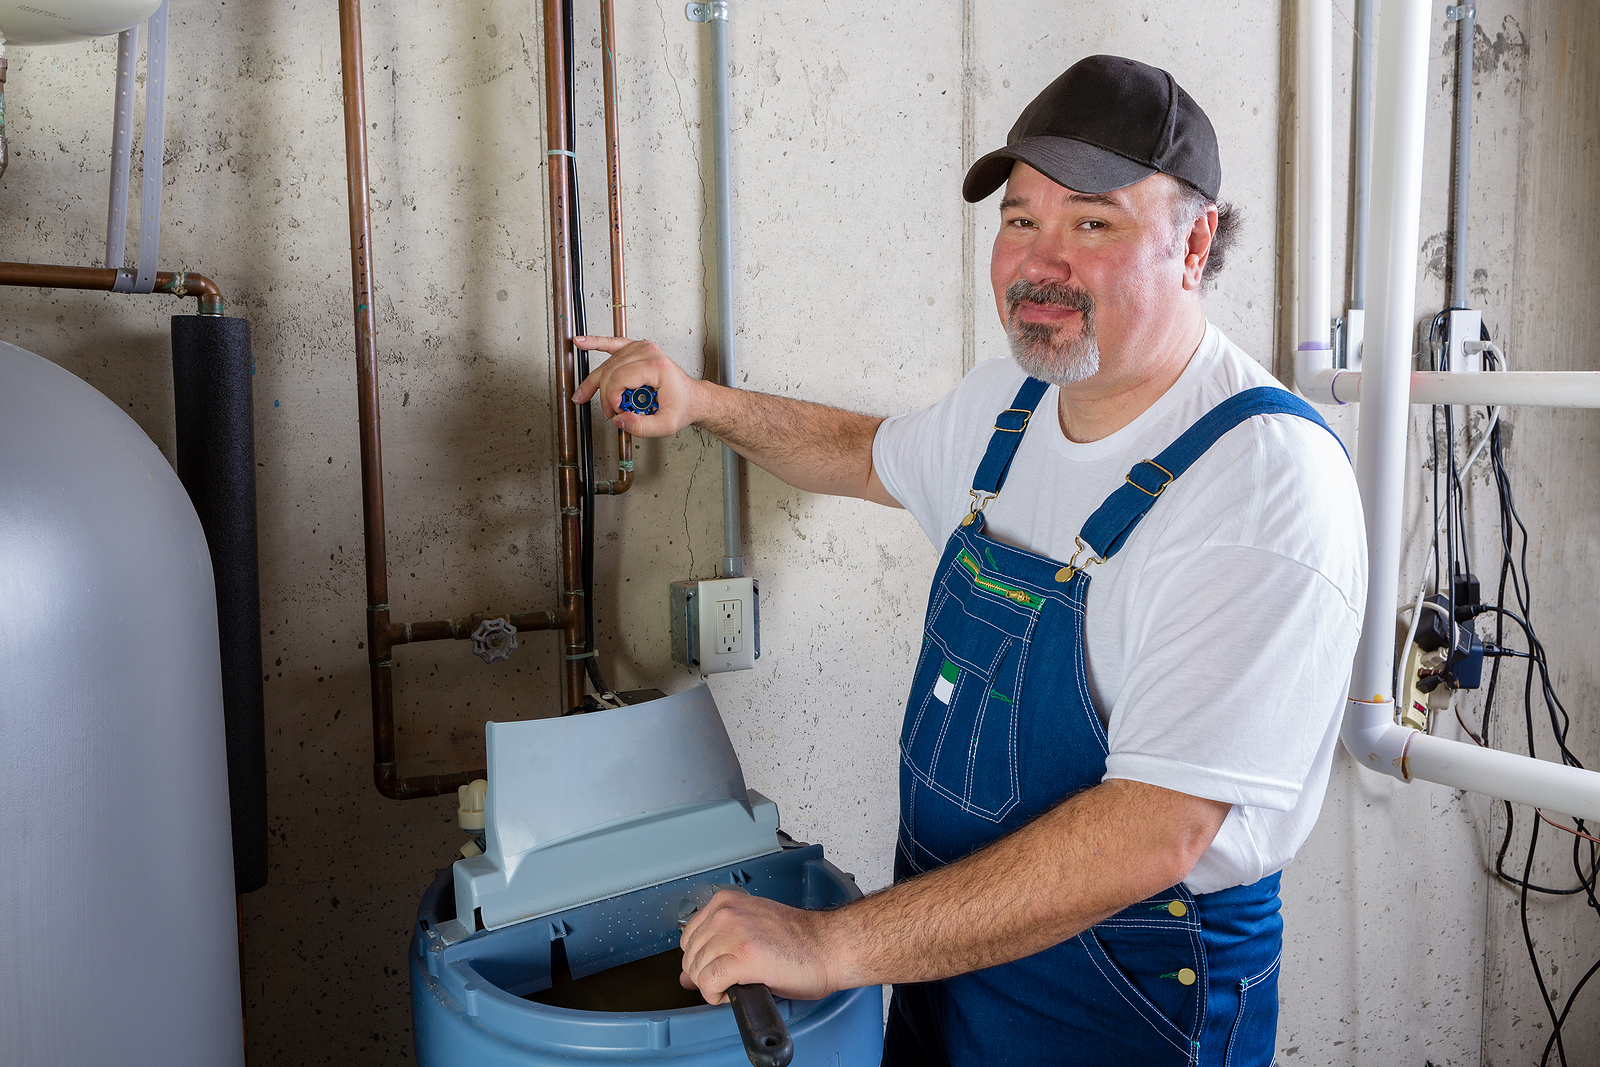
Treatment and Removal of Nitrates
Three effective techniques for removing nitrates in drinking water are widely recognized:
Distillation: This traditional method involves heating water to create vapor, which is then condensed back into liquid form. This process effectively removes nitrates, as well as other impurities.
Reverse Osmosis: A popular choice, reverse osmosis uses a semipermeable membrane to filter out contaminants, including nitrates, from water.
Absorption: This method utilizes an electrical charge to attract and trap contaminants like nitrates, effectively removing them from the water.
Each of these methods has its unique advantages, and the choice largely depends on your specific situation, such as the level of nitrate contamination and your water usage requirements.
Preventing nitrate pollution is crucial for maintaining water quality.
In agricultural settings, responsible fertilizer application can significantly reduce nitrate runoff. Timing and quantity are key factors.
Industries should follow stringent waste disposal guidelines, and agricultural practices should be reviewed for their environmental impact, focusing on sustainable methods.
Bottom Line
Moreover, nitrates in drinking water pose a significant health risk, and understanding how to manage and prevent this contamination is crucial. Remember, ensuring the purity of your water is not just about meeting standards, but about protecting the health and well-being of our communities.
We encourage proactive measures and vigilance in safeguarding water quality. For more information on how you can ensure the safety of your water, visit Rayne Water. If you’re looking to take a more active role in water treatment, reach out to us today.
FAQs on Nitrate in Drinking Water
What are nitrates in water?
Nitrates are compounds found in water that consist of nitrogen and oxygen. They occur naturally but can reach harmful levels due to human activities like agriculture and industrial processes.
How do nitrates get into drinking water?
Nitrates primarily enter drinking water through agricultural runoff, industrial discharges, and wastewater. Fertilizers and sewage are common sources of nitrates in water.
What health risks are associated with nitrates in drinking water?
High levels of nitrates in drinking water can pose health risks such as blue baby syndrome in infants, and increased risk of certain cancers in adults.
How can I test my water for nitrates?
Water can be tested for nitrates using home testing kits or through laboratory analysis, which provides more detailed and accurate results.
What methods are used to remove nitrates from water?
Techniques for nitrate removal include distillation, reverse osmosis, and absorption. Each method has its unique advantages and is chosen based on the specific water contamination situation.
In our comprehensive guide on boil water advisory, we at Rayne Water aim to provide you with a deeper understanding of water contamination, its causes, and the risks it poses. This information will help protect the quality of your drinking water.
Causes of Water Contamination
Water contamination is a complex issue that can be categorized into three main types: biological, chemical, and physical. Each type has its unique challenges and health risks.
Biological Contaminants
Biological contaminants in water include bacteria, viruses, and parasites. These microorganisms can enter water sources through various means, such as sewage discharges and agricultural runoff.
Common biological contaminants include Campylobacter, Norovirus, E. coli, Rotavirus, Enterovirus, Salmonella, Giardia, Shigella, and Hepatitis A virus.
The health risks associated with these contaminants range from mild gastrointestinal distress to serious illnesses like cholera, typhoid fever, and dysentery.
Chemical Contaminants
Chemical contaminants in water include a wide range of substances like arsenic, nitrate, copper, radon, and lead.
These chemicals can contaminate water through industrial discharges, agricultural activities (such as the use of pesticides and fertilizers), and urbanization.
The impact of chemical pollutants on human health can be severe, leading to chronic conditions such as cancer, liver damage, and reproductive issues.
Additionally, chemicals can disrupt the natural balance of aquatic ecosystems, harming wildlife and plant life.
Physical Contaminants
Physical contaminants primarily consist of sediments, rust, and foreign particles that can enter water bodies through soil erosion, urban runoff, and industrial waste. These contaminants
affect the clarity and safety of water, making it unsuitable for drinking and damaging aquatic habitats.
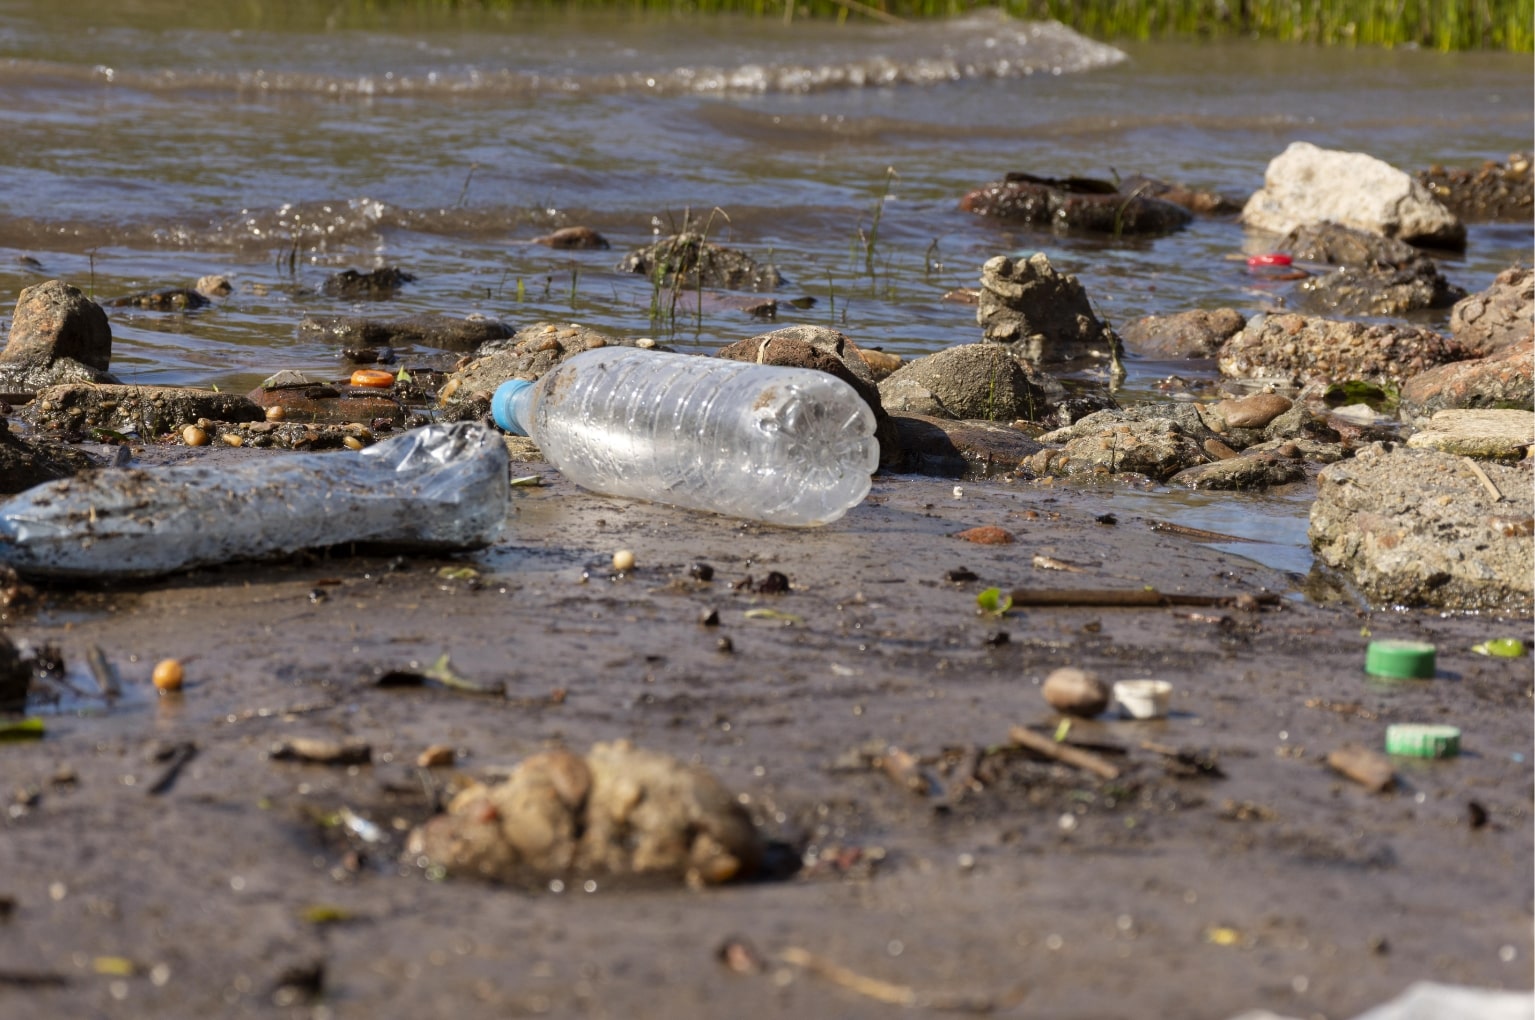
Physical pollution also includes litter, such as plastics, that can harm aquatic life and clog waterways. Understanding these causes of water contamination is crucial for effective prevention and management.
By being aware of how these contaminants enter our water supply, we can take steps to reduce their impact and protect our health and the environment.
The prevention of water pollution requires collective action. This includes proper disposal of waste, reducing the use of harmful chemicals, minimizing plastic waste, supporting conservation efforts, and ensuring proper treatment of wastewater.
Sources: Centers for Disease Control & Prevention, Britannica, Natural Resources Defense Council, and World Water Forum
Health Risks and Concerns
Water contamination can lead to numerous health issues, including:
Waterborne Diseases: Diseases such as cholera, giardia, and typhoid can spread through contaminated drinking water. These pathogens often originate from sewage and agricultural runoff.
Vulnerable Populations: Certain groups, including children, the elderly, and the immunocompromised, are more susceptible to the effects of waterborne diseases.
Long-term Health Implications: Prolonged exposure to contaminated water can lead to chronic health conditions like cancer and reproductive issues.
Boil water advisories are issued as a response to several triggers, mainly related to concerns about water safety. The most common reasons include:
Indicators of Sewage Contamination: This could be due to a breach in the sewage system impacting the water supply.
Failure of the Distribution System: A breakdown in the water distribution system, like a significant pipe burst, can necessitate an advisory.
Pollution Event Near a Water Source: Any contamination near the water source, like chemical spills, can trigger an advisory.
Detection of Waterborne Pathogens: The presence of harmful microorganisms in water samples can also prompt advisories.
These advisories are part of regulatory and safety standards to ensure public health.
Communication about the advisories typically involves a coordinated effort between local authorities, health departments, and emergency management agencies.
Impacted Communities and Notifications
Identifying affected areas and demographics is a key step during a boil water advisory. Local authorities and government agencies play a crucial role in this process.
Methods of notification often include:
Public Announcements: These could be through local media, official websites, or social media platforms.
Alerts: Systems like Reverse 911, Wireless Emergency Alerts, and other phone alert systems coordinated by agencies such as FEMA are used to notify residents.
Direct Communication: This includes emails, text messages, or even door-to-door notifications in severe cases.
The responsibility of notifying the public typically falls on local government agencies and water utilities. They ensure that accurate and timely information reaches all affected individuals.
Safe Water Handling During Advisories
During a boil water advisory, it’s crucial to handle water safely to avoid health risks. Here are some precautions and tips:
Use bottled or boiled water. If boiling, ensure it’s at a rolling boil for at least one minute.
Use boiled or bottled water for brushing teeth. Avoid swallowing water during showers or baths.
It’s safer to use disposable utensils and plates. If using a dishwasher, ensure it reaches a sanitizing temperature. Hand-washed dishes should be rinsed with boiled water.
Provide them with bottled or cooled boiled water, as they can be affected by the same contaminants as humans.
Follow the guidance provided by health authorities during these advisories to maintain safety and health.
At Rayne Water, we’re committed to providing solutions for safe and clean water. Remember, staying informed and prepared is key to navigating boil water advisories effectively.
Boiling Water: How-To and Tips
When a boil water advisory is issued, boiling your water correctly is crucial. Here are detailed steps and tips for effective boiling:
Steps for Boiling Water:
Fill a pot with water from your tap.
Place it on your stove and turn the heat to high.
Wait until the water reaches a rolling boil, where large bubbles are vigorously rising to the surface.
Continue this rolling boil for at least one minute to ensure all pathogens are killed.
For higher altitudes (above 6,500 feet), boil water for three minutes due to the lower boiling point at these elevations.
Cooling and Storing Boiled Water:
After boiling, turn off the heat and let the water cool down naturally.
Pour the cooled water into clean, sanitized containers with lids.
Store these containers in a cool, dry place away from direct sunlight.
Using boiled water for drinking, cooking, washing fruits and vegetables, and for making ice can significantly reduce the risk of waterborne illnesses.
Rayne Water has been the one-stop shop for residential & commercial water treatment customers for nearly a century. Get a quote today.
Alternative Water Sources
During boil water advisories, it’s important to know your options for safe drinking water.
When locating clean water, check for community alerts on locations where bottled water is distributed. Local supermarkets and stores usually stock up on bottled water during these advisories.
And keep an eye on local news or community websites for updates on water distribution points.
When performing DIY water purification methods, make sure to disinfect water when boiling is not an option. You can also use unscented household liquid bleach. For clear water, add one-eighth of a teaspoon (about 8 drops) of bleach per gallon of water. Stir well and let it stand for at least 30 minutes.
If the water is cloudy, filter it through a clean cloth, and then add one-fourth of a teaspoon of bleach per gallon. Again, wait for at least 30 minutes before using.
These methods can provide temporary relief during advisories, ensuring that you have access to safe drinking water.
Factors determining the duration of a boil water advisory include contamination levels, repair times, testing, and agency roles.
Factors Determining Advisory Lifespan
Several variables impact how long an advisory stays in place:
The level and type of pathogens or pollutants found in the water supply.
The time required to repair and rectify issues such as broken pipes or compromised water systems.
Continuous testing is done to ensure water safety. Advisories are lifted only when consecutive tests show no contamination.
Government and Public Health Roles
These agencies are pivotal during advisories:
Monitoring: Continuous sampling and testing of water quality.
Public Communication: Providing regular updates to the public about the status of the water supply and safety measures.
Decision-making: Based on test results and health guidelines, determining when the water is safe for consumption.
Monitoring and Testing for Water Safety
Ensuring water quality involves detecting and measuring the level of contaminants. Water must meet specific safety standards set by health authorities before an advisory can be lifted.
Bottom Line
To summarize, understanding and following boil water advisories are key to ensuring your health and safety. It’s essential to stay informed, use safe water practices, and be aware of alternative water sources. By being proactive about water safety, we can better protect ourselves and our communities from potential health risks.
For more information about water treatment and filtration options, contact us today.
FAQs on Boil Water Advisories
What is a boil water advisory?
A Boil Water Advisory is issued when there’s potential contamination of the water supply. It advises residents to boil tap water before using it for drinking, cooking, or other consumption to ensure safety from pathogens.
How should I boil my water during an advisory?
Boil water vigorously for at least one minute, and three minutes if you’re at an elevation above 6,500 feet. Let it cool before use and store it in clean containers.
Can I shower or bathe during a water boil advisory?
Yes, you can shower or bathe, but be cautious not to ingest the water. For infants and young children, consider giving them a sponge bath to reduce the risk of swallowing water.
Is it safe to use household filters during a San Diego boil water advisory?
Most household water filters do not remove bacteria or viruses. Therefore, it is recommended to boil water even if you have a water filter.
How will I know when the advisory has been lifted?
Stay updated through local news, government websites, or community alerts. The advisory will be lifted once authorities confirm the water supply is free from contamination and safe for use.
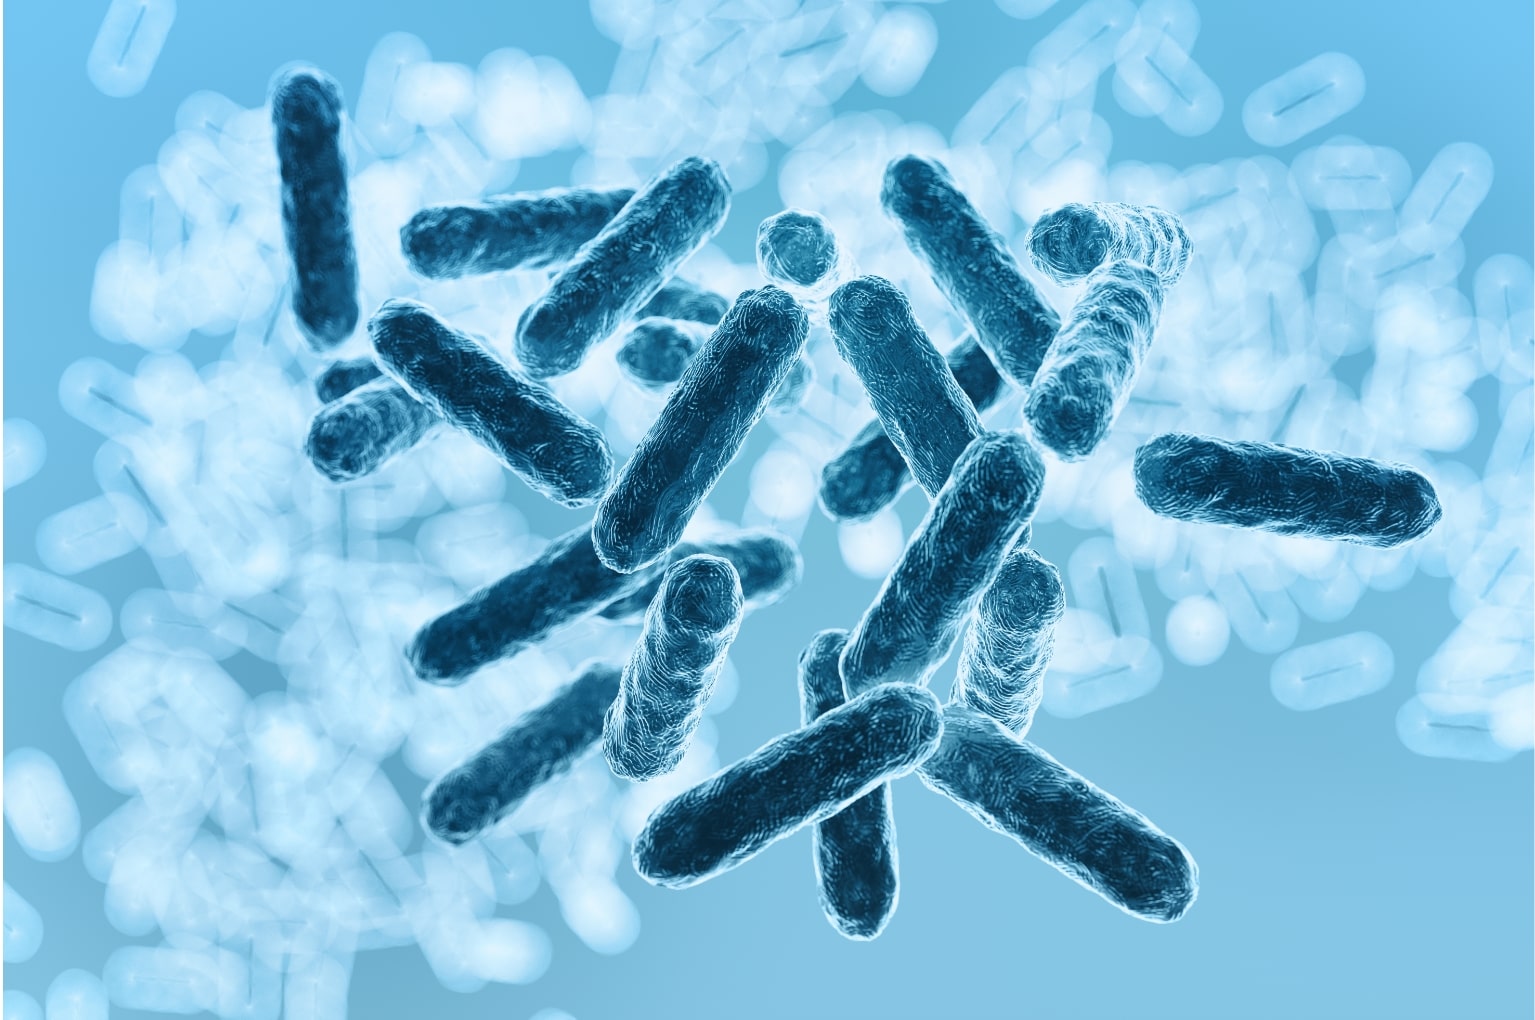
At Rayne Water, we recognize the importance of understanding E. coli contamination in water, as it’s crucial for ensuring safe and healthy water consumption. Here’s a comprehensive look at what you need to know about E. coli in water.
Understanding E. Coli Bacteria
E. coli, short for Escherichia coli, is a type of bacteria commonly found in the intestines of humans and animals. While most strains of E. coli are harmless, some can cause severe illness.
E. coli in water supply is a strong indicator of fecal contamination from sewage or animal waste, posing serious health risks. Vulnerable groups such as young children, the elderly, and those with compromised immune systems are particularly at risk.
The symptoms of E. coli infection can range from mild diarrhea to severe complications like kidney failure and, in extreme cases, death.
Varieties of E. Coli Strains
There are various strains of E. coli, each with differing levels of virulence and associated health risks.
For instance, Shiga toxin-producing E. coli (STEC) is known to cause severe foodborne diseases. STEC can lead to life-threatening conditions, including hemolytic uremic syndrome (HUS), particularly in young children and the elderly.
Human Health and E. Coli
The health implications of E. coli contamination in water are significant. Infection can lead to symptoms like abdominal cramps, diarrhoea, and more severe conditions such as HUS, characterised by acute renal failure, hemolytic anaemia, and low blood platelets.
It’s estimated that up to 10% of patients with STEC infection may develop HUS, with a case-fatality rate ranging from 3 to 5%.
E. coli can enter water supplies through various pathways, including runoff from farms, leaking septic systems, and improperly treated wastewater. Understanding these sources is vital for prevention and control of E. coli growth in water supplies.
Common Sources of E. Coli in Drinking Water
Natural sources like wildlife and domestic animals contribute to E. coli contamination. Man-made sources include agricultural runoff, wastewater treatment plants, and unhygienic practices in food handling and preparation.
Impact of E. Coli Sources
The presence of E. coli in drinking water not only affects human health but also has environmental and economic impacts.
Contaminated water sources can lead to closures of recreational water areas and impact local economies dependent on tourism and water-based activities.
Understanding the health implications of E. coli exposure is essential. Certain strains of E. coli, such as E. coli O157:H7, produce toxins that can damage the small intestine lining, leading to symptoms like bloody diarrhoea.
These infections are often acquired through ingesting small amounts of the bacteria, which can be present in undercooked meat or contaminated water.
High-risk groups include young children, older adults, and individuals with weakened immune systems. Common symptoms of an E. coli infection include abdominal pain, nausea, bloody diarrhoea, and in severe cases, a life-threatening form of kidney failure known as hemolytic uremic syndrome (HUS).
There are several methods available for detecting E. coli in water, including do-it-yourself (DIY) home testing options.
Litmus Paper Test: A simple method to detect E. coli in water is using a litmus paper strip. This strip changes color when it comes into contact with water containing E. coli bacteria. (Onit Home)
Coliform Bacteria Test Kits: These kits are designed for testing well water for coliform bacteria, which include E. coli. The process typically involves filling a bottle with water and observing color changes in the presence of bacteria. (Clean Water Store)
DipTest Method: Developed by researchers at the University of Waterloo, the DipTest is a newer, cost-effective method that uses a litmus paper-like strip to detect E. coli. The bottom of the strip is coated with a sugar that attracts E. coli, and as the bacteria move up the paper, they react with chemicals to produce a color change. (Food Quality & Safety)
Water Test Strips and Powder Kits: These kits involve dipping a test strip into a water sample and comparing the color change on the strip to a provided chart. The strips can indicate the type of contaminant and its concentration in parts per million. Powder kits, on the other hand, require adding water to a container with powder and comparing the resultant color to a reference.
UV Lamp Detection: Some DIY test kits may require additional equipment like a UV lamp with a specific wavelength to detect E. coli. This method is often used in conjunction with other testing techniques for more reliable results. (Safe Home Test Kits)
To explore more water contamination solutions, visit Rayne Water.
Preventing E. Coli Contamination
Preventing E. coli contamination involves several steps.
At an individual level, avoiding raw milk, unpasteurized dairy products, and unpasteurized juices, as well as being cautious about swallowing water while swimming, can reduce risk.
In food preparation, preventing cross-contamination is crucial. This includes washing hands, counters, cutting boards, and utensils thoroughly after they come in contact with raw meat.
Public water systems generally treat water to eliminate E. coli, but private water systems may require additional filtration or treatment methods to ensure safety.
Remember, staying informed and proactive are key to ensuring the safety of your water supply.
At Rayne Water, we offer a range of water treatment and filtration solutions that can help protect your water supply against contaminants like E. coli. Explore our options.
E. Coli Outbreaks and Case Studies
E. coli outbreaks have occurred in various contexts, with instances linked to food sources. For example, leafy greens, especially romaine lettuce, have been repeatedly associated with Shiga toxin-producing E. coli outbreaks.
Traceback investigations of these outbreaks revealed the complexity of pinpointing contamination sources and stressed the importance of improved traceability systems in the food supply chain.
In 2018 and 2019, E. coli infections linked to romaine lettuce resulted in hundreds of illnesses and hospitalizations, emphasising the challenges and the need for regulatory improvements in food safety.
Ground beef is another common source of E. coli outbreaks. In 2018, an outbreak linked to ground beef from a specific producer resulted in multiple infections across several states, including hospitalizations and a fatality.
Sources: Centers for Disease Control & Prevention, National Library of Medicine, Everyday Health
Regulations and Water Safety Standards
The FDA and other regulatory bodies emphasize the importance of clear labeling on food products, particularly for products like lettuce, to enhance traceability and consumer safety.
This initiative aims to improve the FDA’s ability to provide targeted information during E. coli outbreaks and facilitate prompt response measures.
Additionally, adherence to water safety standards set by government bodies is crucial in preventing E. coli contamination in water supplies.
At Rayne Water, we understand that water contaminants can jeopardize our health and environment. Whether you need a residential water softening system for hard water problems or a water filtration treatment system for your commercial use, we have it all.
Medical treatment for E. coli infections typically involves supportive care, such as hydration and rest. In severe cases, hospitalization may be necessary. Antibiotics are not usually recommended as they can sometimes worsen the condition.
It’s essential to consult healthcare professionals for proper diagnosis and treatment.
Self-care after exposure includes managing symptoms at home under medical guidance. Dietary adjustments and adequate rest are crucial for recovery.
It’s also vital to understand the potential long-term effects of E. coli exposure, such as kidney problems, and ensure regular medical follow-ups.
Bottom Line
Understanding E. coli in water supply and food, its potential health impacts, and the necessary prevention measures is critical. Regular testing of water sources, adherence to food safety regulations, and staying informed about outbreak cases can significantly reduce the risks associated with E. coli.
At Rayne Water, we are committed to helping you ensure the safety and quality of your water supply. Explore our solutions for clean and safe water.
For more information about water treatment and filtration options, contact us today.
FAQs on E.Coli in Water
What is E. coli in water and how does it get into the water supply?
Escherichia coli (E. coli) is a bacterium commonly found in the intestines of humans and animals. Some strains can cause illness. E. coli can enter water supplies through various means, such as agricultural runoff, sewage leaks, or contaminated stormwater.
What are the common symptoms of E. coli infection?
Symptoms of E. coli infection typically include stomach cramps, diarrhoea (which can be bloody), and vomiting. In severe cases, it can lead to more serious conditions like kidney failure, especially in vulnerable populations like children and the elderly.
How can I test my water for E. coli contamination?
Water can be tested for E. coli contamination using home testing kits available in the market or by sending water samples to a certified laboratory. These tests can detect the presence of E. coli and inform you about the safety of your water.
What should I do if I suspect E. coli contamination in my water?
If you think your water is contaminated with E. coli, avoid using it for drinking, cooking, or brushing teeth until it’s tested. Use boiled or bottled water instead. If your water test confirms E. coli presence, contact local health authorities for guidance on treatment and use.
How can E. coli contamination in water be prevented?
E. coli contamination can be prevented by ensuring proper treatment and sanitation of water supplies. This includes regularly inspecting and maintaining private wells, using appropriate water filtration systems, and practising safe food handling to prevent cross-contamination.
Clean water is a cornerstone of human health, impacting everything from disease prevention to economic growth.
It’s a vital resource, yet, as highlighted by Oxfam, over 2 billion people currently lack safe water at home, significantly contributing to poverty and health crises.
According to the World Health Organization (WHO), over 2 billion people live in water-stressed countries, with issues exacerbated by climate change and population growth.
At Rayne Water, we understand that water contaminants can jeopardize our health and environment. Whether you need a residential water softening system for hard water problems or a water filtration treatment system for your commercial use, we have it all.
Let’s explore the three main types of water contaminants: chemical, biological, and physical, and their significant health and environmental impacts.
Chemical Contaminants
Common chemical pollutants in water include industrial chemicals and pesticides from agricultural runoff. These contaminants have severe impacts on both human health and the environment.
Biological Contaminants
Water can be contaminated by various microorganisms like bacteria, viruses, protozoa, and parasites. These biological agents are responsible for diseases like cholera and dysentery.
Physical Contaminants
Physical contaminants primarily include sediment, suspended solids, and heavy metals like lead and mercury. These substances cause a range of health problems, from digestive issues to severe neurological damage.
What are the Sources of Water Contaminants?
There are four key water pollution sources: point and nonpoint pollution, natural sources, and emerging contaminants, plus their management.
Point Source Pollution
Point source pollution, which includes waste discharged from factories and sewage plants, is regulated by laws and permits. Despite these measures, it can still significantly harm aquatic ecosystems and nearby communities.
Non-Point Source Pollution
Non-point source pollution is challenging to control due to its diffuse nature. It includes agricultural runoff, urban drainage, and air pollution deposits. Effective strategies for its mitigation involve erosion control, urban planning, and sustainable farming practices.
Natural Sources
Natural contaminants like certain minerals can affect water quality. Managing these involves strategies like filtration and well construction to ensure safe water supply.
Emerging Contaminants
Emerging contaminants, including certain pharmaceuticals and personal care products, are a growing concern for water quality. Regulatory bodies are continuously adapting to address these new challenges through research and potential regulatory changes.
To explore more water contamination solutions, visit Rayne Water.
As we delve into the risks posed by water contaminants, let’s understand their impact on our health. Water contaminants, whether chemical, biological, or physical, can have far-reaching effects on our well-being.
Short-Term Health Effects
When we’re exposed to contaminated water, even for a short period, the repercussions can be immediate and distressing. Contaminated water symptoms include gastrointestinal problems like diarrhea and vomiting.
These symptoms are more than just uncomfortable – they lead to severe dehydration and require prompt medical attention. It’s a reminder of why ensuring the safety of our water is a must.
Long-Term Health Effects
The long-term effects of water contamination are, perhaps, even more concerning. Prolonged exposure to certain contaminants can harm the nervous system, potentially leading to cognitive impairments, developmental delays, and behavioral disorders. These effects might not be immediately obvious, making them particularly dangerous.
Vulnerable Populations
It’s heart-wrenching to think about the impact of water contaminants on the most vulnerable among us.
Children, with their developing immune systems and smaller body sizes, are particularly at risk. They can suffer from more severe gastrointestinal issues and developmental problems.
Older adults, with their weakened immune systems, face an increased risk of cardiovascular diseases and respiratory conditions linked to water contaminants.
And let’s not forget pregnant women, for whom clean water is vital. Contaminants can harm not only the mother but also the developing fetus, potentially causing long-term health issues.
What are the Environmental Impacts?
Beyond human health, water contaminants wreak havoc on our environment. The impacts are vast and varied:
Contaminated water can devastate aquatic life, leading to decreased biodiversity and disrupting delicate ecological balances.
Some contaminants accumulate in the bodies of aquatic organisms, becoming more concentrated as they move up the food chain, affecting larger species and eventually reaching us.
Water runoff carrying contaminants can lead to soil and land pollution, further affecting plant life and terrestrial ecosystems.
Rayne Water has been the one-stop shop for residential & commercial water treatment customers for nearly a century. Get a quote today.
Regulations and Water Quality Standards
Navigating the waters of regulations and standards is crucial for ensuring water safety. Key players and policies include:
Government Agencies: Agencies like the Environmental Protection Agency (EPA) in the U.S. play a pivotal role in setting and enforcing water quality standards.
Safe Drinking Water Act (SDWA): This critical legislation in the U.S. sets the stage for protecting public drinking water supplies from harmful contaminants.
Environmental Protection Agency (EPA): The EPA is at the forefront of regulating water quality and implementing policies to safeguard our health and environment.
Rayne Water can help ensure that your water is safe and healthy for all.
Methods of Water Contaminant Testing
Here, we dive into water quality testing methods: laboratory analysis, field testing, and real-time monitoring, each offering unique insights and benefits.
Laboratory Analysis
Laboratory analysis is a cornerstone of water quality testing. By sending water samples to a lab, we can get a detailed breakdown of what’s in our water, including various water contaminants.
Techniques like chromatography, spectrometry, and microbiological analysis are used to detect a range of contaminants, from heavy metals to bacteria. Each method has its strengths, providing us with the data we need to make informed decisions.
Lab testing offers precision and a broad scope of detection. However, it can be time-consuming and requires sending samples offsite, which might delay action in urgent situations.
Field Testing and Monitoring
Field testing allows for on-site evaluation of water quality. This is crucial for immediate assessment and decision-making.
With advancements in technology, portable testing devices have become invaluable. They allow for quick and efficient testing of water quality directly in the field.
Real-time monitoring systems provide continuous data on water quality, alerting us to any changes or potential contamination events as they happen. This proactive approach is essential for maintaining water safety.
Addressing water contamination isn’t just about detection; it’s about solutions. Here’s how we tackle it:
Cities and towns typically have large-scale water treatment facilities that use processes like filtration, sedimentation, and disinfection to ensure safe public water supplies.
For added security, many of us turn to home water filtration systems. These can range from simple pitchers with filters to sophisticated whole-house systems, providing an extra layer of protection against water contaminants.
Simple methods like boiling water or using chlorination and UV treatment can be effective in purifying water, especially in emergency situations or areas without access to advanced water treatment facilities.
The Importance of Water Contaminant Awareness
Understanding the risks of water contamination is crucial for our health. By staying informed, we can take steps to protect ourselves and our families from the potential health hazards of contaminated water.
Our environment suffers when water is contaminated. Awareness and action can help preserve aquatic ecosystems and protect the biodiversity that depends on clean water.
Water contaminant awareness goes beyond personal well-being. It’s a social responsibility, ensuring that everyone, regardless of where they live, has access to safe, clean water.
Bottom Line
We all have a role to play in ensuring access to clean water. Whether it’s supporting policies that protect water sources or using home filtration systems, every action counts.
Staying informed about water contamination and its impacts is vital. By advocating for change and supporting efforts to protect our water, we contribute to a healthier, more sustainable world.
For more information on how you can ensure the safety of your water, visit Rayne Water. If you’re looking to take a more active role in water treatment, reach out to us today.
Together, we can make a difference in the fight against water contamination.
FAQs on Water Contaminants
What are water contaminants?
Water contaminants are substances that pollute water, making it unsafe or unsuitable for use. They include chemicals, heavy metals, biological organisms like bacteria and viruses, and physical particles. These contaminants can enter water sources through industrial discharge, agricultural runoff, natural geological processes, or inadequate waste disposal practices.
How can I tell if my water is contaminated?
Some common signs of water contamination include unusual taste, odor, or color. However, many contaminants are not detectable by taste, smell, or sight. The most reliable way to determine if your water is contaminated is through laboratory testing.
What are the health risks of contaminated water?
Short-term effects can include gastrointestinal illnesses, while long-term exposure leads to more serious conditions like neurological disorders, reproductive problems, and an increased risk of cancer.
What can I do to ensure my water is safe?
You can ensure safer water by using home water filtration systems, regularly testing your water, and staying informed about the water quality in your area. In areas with known water quality issues, boiling water or using other purification methods like UV treatment can be effective.
Are there regulations for water safety?
Water safety is regulated by government agencies such as the Environmental Protection Agency (EPA) in the United States. These agencies set and enforce standards for water quality, monitor public water systems, and issue guidelines for the treatment and distribution of safe drinking water.
When it comes to nurturing our gardens and houseplants, water plays the biggest role of all.
But have you ever wondered if the type of water you use affects the health and growth of your green companions?
At Rayne Water, we understand the importance of giving the best care for our plants.
In this blog post, we’ll explore the impact of hard water on plant growth and share insights on how to handle its effects.
Understanding Hard Water
Hard water is characterized by its high mineral content, mainly calcium and magnesium ions.
These minerals dissolve in water as they pass through geological formations, picking up elements along the way.
The result is water that’s filled with these minerals, which can affect our household appliances and also our plants.
That’s why hard water vs. soft water for plants is a common thought for most plant owners, and if you’re unsure about your water quality, it’s a good idea to have it tested.
We provide free water tests performed by our experienced technicians to know which water treatment system is best for your home or business’ water quality.
Effects of Hard Water on Plant Growth: Watering Plants with Hard Water
Nutrient Uptake Interference
Is hard water bad for plants?
One major drawback of hard water on plants is its interference with nutrient uptake.
While calcium and magnesium are great nutrients for plants, too many of these minerals will only cause issues.
The high mineral content in hard water delays the absorption of other vital nutrients, like potassium and iron.
As a result, plants may suffer from nutrient deficiencies, leading to stunted growth and poor overall development.
Altered Soil pH
Soil pH is crucial for nutrient availability, as it determines the solubility of essential nutrients.
The minerals in hard water can elevate soil pH levels, making it more alkaline. This change in pH will limit the availability of certain nutrients, delaying plant growth even more.
Root Health and Oxygen Absorption
The health of a plant’s roots is key to its overall well-being. Unfortunately, hard water minerals don’t have the best effect on root health.
When these minerals build up in the soil, they reduce oxygen exchange in the root zone. This, in turn, can set back root growth and lead to stressed and weakened plants.
Accumulation of Mineral Buildup in Soil
When you regularly use hard water for irrigation, it causes minerals to accumulate in the soil.
As these minerals build up over time, they change the soil’s texture, making it less airy and limiting the nutrients plants can access.
Rayne Water has been providing clean water since 1928. Whether you need a residential water softening system for hard water problems or a water filtration treatment system for your commercial use, we have it all.
Influence of Plant Nutrient Absorption
The effects of hard water on plants go beyond just the roots. It affects the whole plant, delaying its ability to take in vital nutrients.
As mentioned earlier, having too much calcium and magnesium will interfere with the absorption of other elements.
The Impact on Leaf and Stem From Hard Water
One visible effect of hard water being bad for plants is the accumulation of mineral deposits on their surfaces, including leaves and stems.
Deposits on the plant block sunlight, affecting the plant’s photosynthesis process since it stops the light from reaching the chlorophyll.
Hence, the plant will likely struggle to generate energy and grow properly.
Our Rayne Water VIP Program ensures your system is performing at peak efficiency. Join today.
Effects of Reduced Water Penetration
Besides nutrient-related issues, hard water makes it hard for plants to access water. When hard water is used for irrigation, it means there’s less water penetration in the soil.
Root Zone Moisture Deficiency
Less water penetration causes moisture deficiency in the root zone.
Lack of moisture stresses plants and slows down their growth.
Surface Runoff and Erosion
Hard water can trigger surface runoff and soil erosion. If the soil doesn’t absorb water well, the water is more likely to flow over the surface.
Strategies for Improving Water Penetration
Dealing with hard water issues in the soil can be simplified with a few strategies. First, work on improving the soil’s texture.
Next, take steps to help the soil absorb and retain water more efficiently. Lastly, ensure that your plants are consistently getting the water they need.
Managing Hard Water Effects
Now that we’ve listed the many ways hard water affects plant health, let’s discuss how to manage these effects while exploring how to fix hard water for plants.
Here are great practices for watering plants in hard water areas:
Soil Amendments: Consider making changes to the soil. These adjustments will help improve soil structure and nutrient availability so that your plants receive the nutrients they need.
pH Adjustments: If your soil’s pH is off due to hard water, you can use pH-adjusting products to restore the optimal pH levels for your plants. Regular soil testing will help you monitor and adjust pH as much as you need.
Preventive Measures: Prevention is often the best approach. To avoid the impact of hard water on your plants, consider installing a water softener for your irrigation system. This will help reduce the mineral content in the water, making it more suitable for plant use.
When learning how to fix hard water for plants, choosing the right plants for your garden or indoor space makes a big difference.
Some plants handle hard water better than others, and by choosing these more tolerant options, your garden can flourish with less worry about water issues.
Drought-Tolerant Plants
For outdoor landscaping in hard water regions, consider drought-tolerant plants.
These plants have low water requirements and thrive in challenging conditions, making them excellent for water conservation and when watering plants with hard water.
Aquatic and Bog Plants
Incorporating aquatic and bog plants into your landscape is a creative way to embrace hard water conditions.
These plants naturally grow in water or wetland environments, making them well-suited for areas with hard water.
They not only thrive in such conditions but also add diversity and beauty to your garden.
Bottom Line
Moreover, is hard water bad for plants? Hard water does indeed have negative effects on plant growth and health.
It can interfere with nutrient uptake, alter soil pH, hamper root health, lead to mineral buildup in the soil, and affect water penetration.
However, with proper management and the right plant, your plants will thrive.
To maintain healthy plants in hard water regions, monitor your water quality, implement appropriate strategies, and choose plants that are well-suited for your water conditions.
For special solutions tailored to your needs, don’t hesitate to contact us. We’re here to help you create the optimal environment for your beloved plants.
FAQs
Is hard water bad for plants?
Yes, hard water has a high concentration of minerals, mainly calcium and magnesium. These minerals interfere with nutrient uptake, alter soil pH, hinder root health, and lead to mineral buildup in the soil. All of these factors delay plant growth and overall plant health, especially when watering plants with hard water.
How can I test my water for hardness?
One accurate method involves contacting a water testing service or a local water authority, as they provide comprehensive water quality reports. Or you can use DIY water hardness test kits, which are available at many hardware stores and online retailers. These kits include test strips or reagents that change color in response to the level of hardness in the water.
We provide free water tests performed by our experienced technicians to know which water treatment system is best for your home or business’ water quality.
Are there any natural ways to soften hard water for plants?
While there are natural methods to soften hard water for household use, such as boiling or using vinegar, these methods aren’t practical for large-scale plant watering. Boiling water takes time, and adding vinegar isn’t suitable for all plants due to its acidity. Therefore, when considering hard water vs. soft water for plants, it’s best to consider soft water. Water softeners help remove excessive minerals, making the water plant-friendly.
What are some common signs that my plants are suffering from hard water-related issues?
One common sign is yellow leaves, which indicate nutrient deficiencies. Another indication is poor growth, where your plants aren’t growing to their expected size or at a slower rate. Additionally, visible white or chalky deposits on the surface of the soil or on plant leaves are a clear sign of mineral buildup.
Can I use rainwater to water my plants as an alternative to hard water?
Yes, using rainwater as an alternative to hard water is excellent for watering your plants, both indoors and outdoors. Rainwater is naturally soft, meaning it has a lower mineral content, and it is usually pH-neutral. This makes it perfect for plant watering. However, when considering how to fix hard water for plants, there are some things to keep in mind. Rainwater may lack certain essential minerals that your plants need for healthy growth, so using a balanced fertilizer will do just the trick.
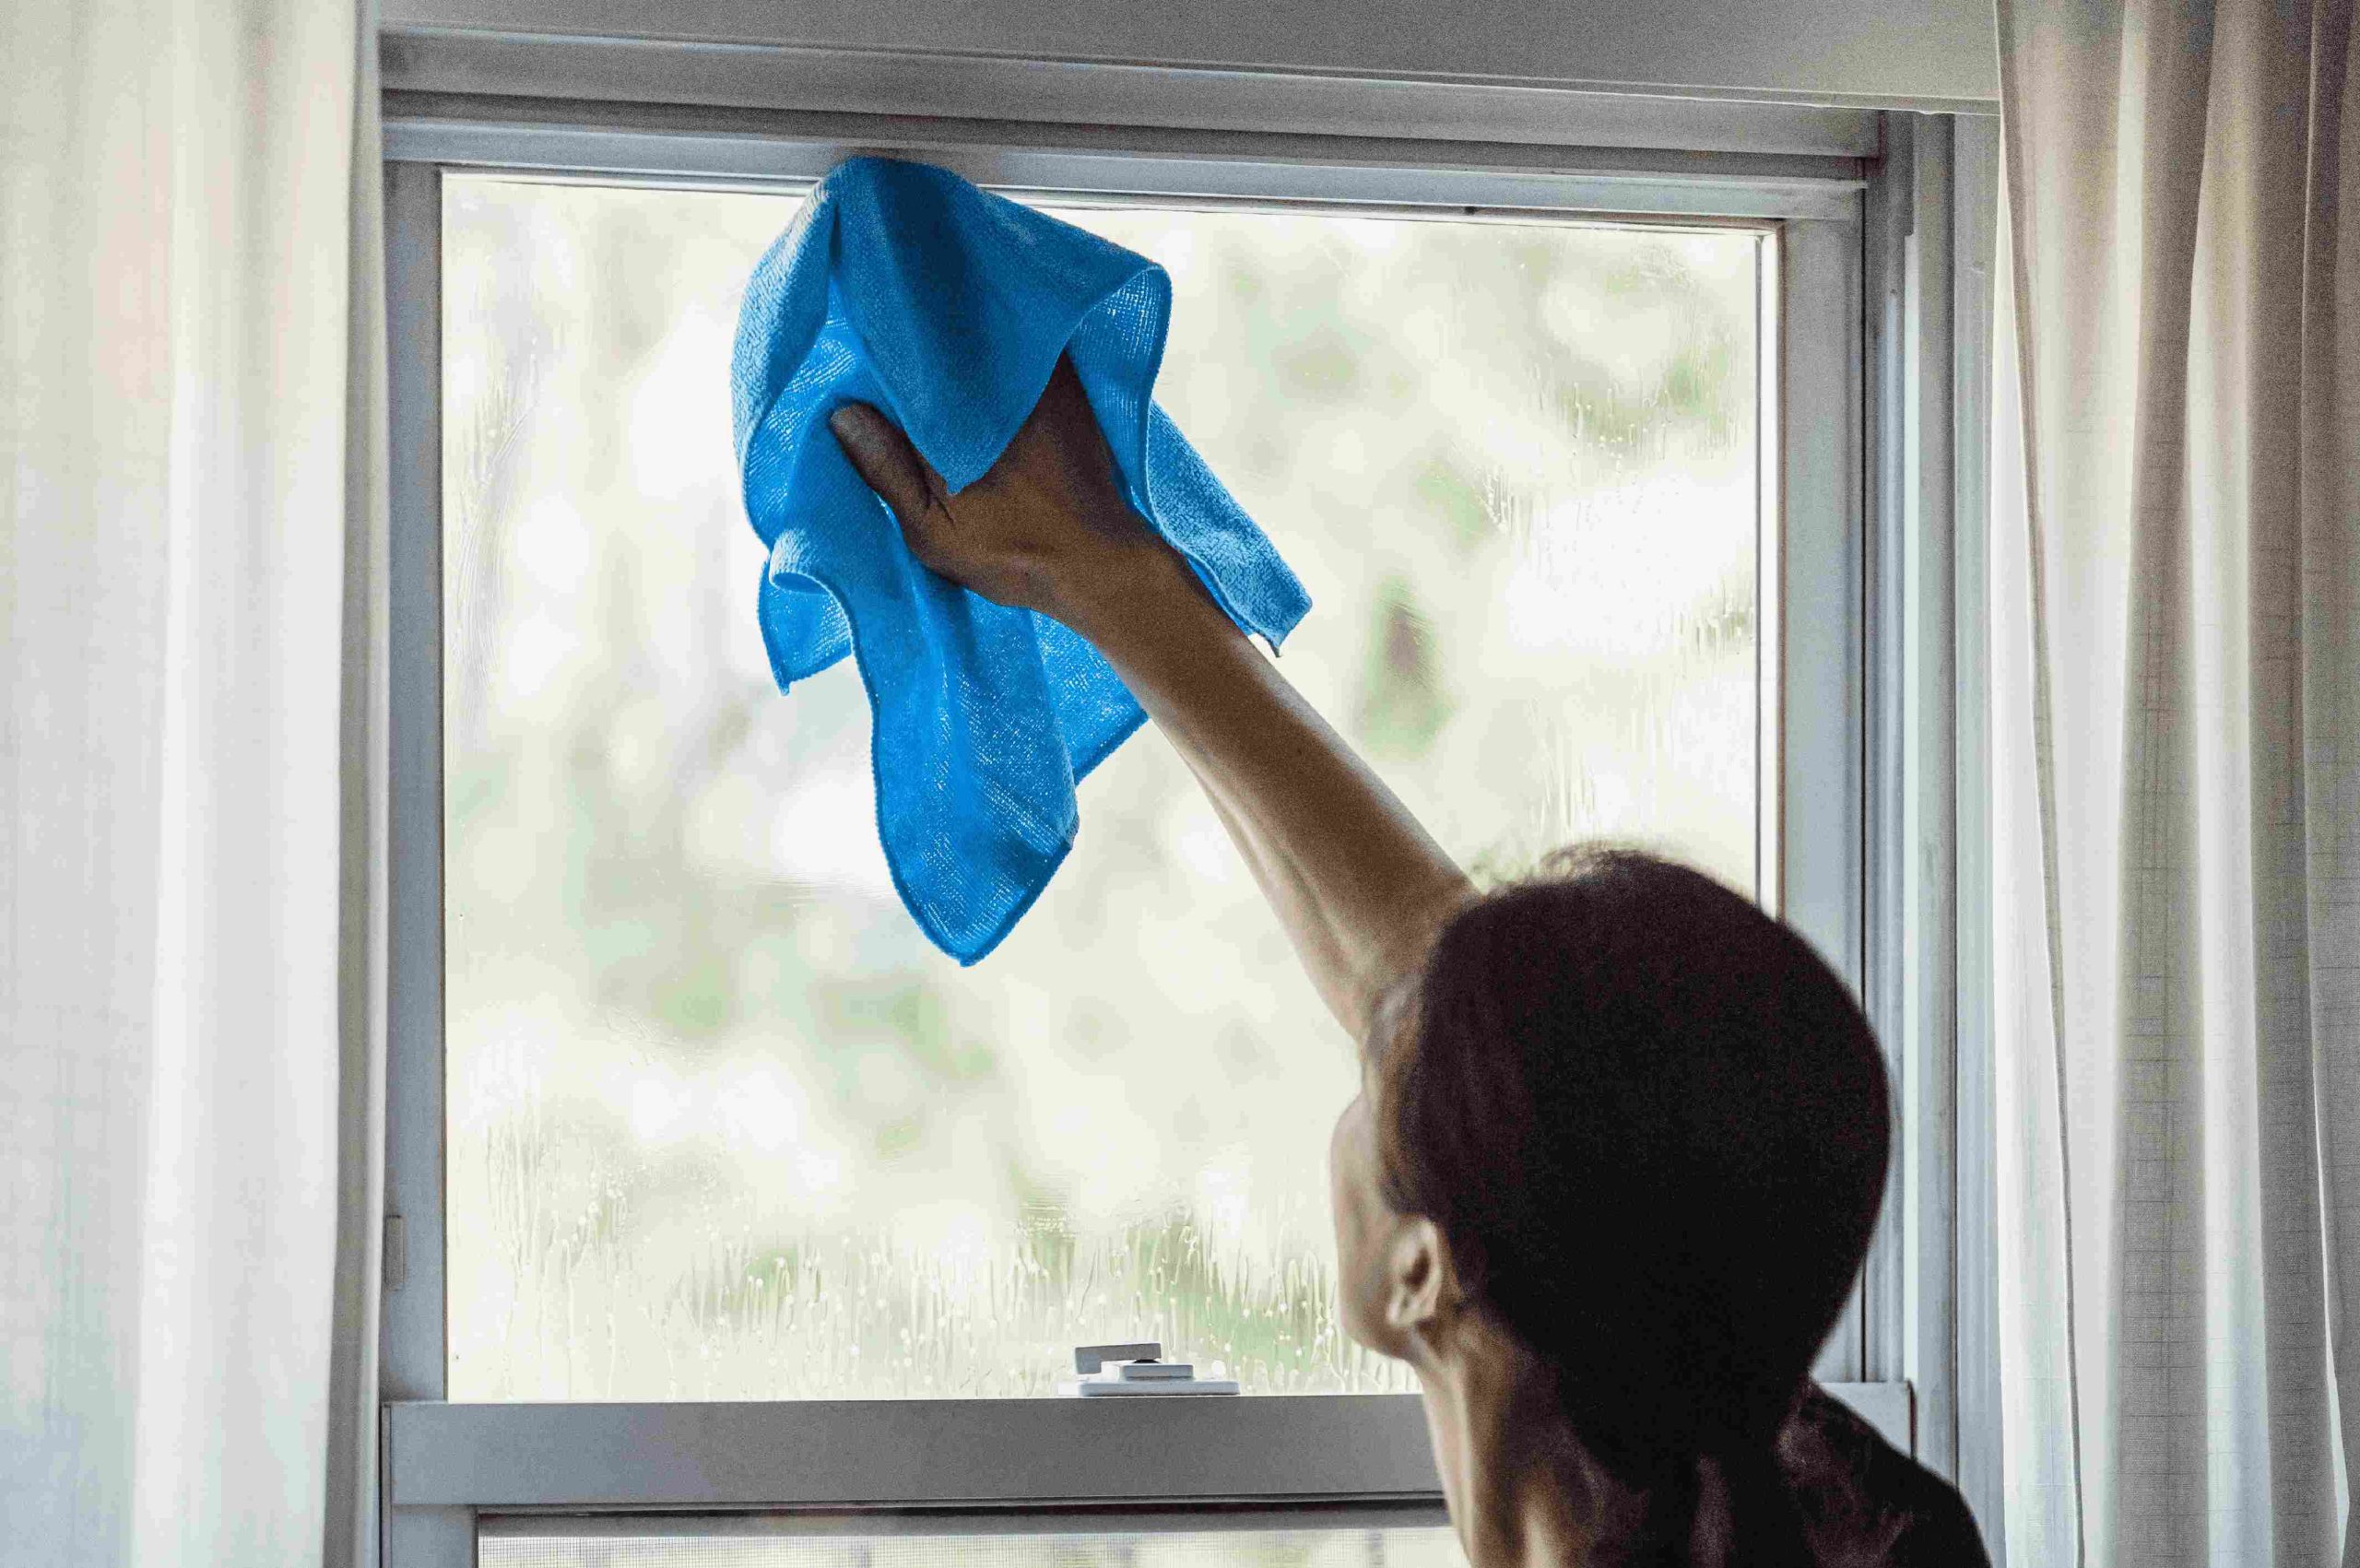
Today, we’re tackling one of the most common household nuisances: how to get water stains off glass.
Rayne Water understands the frustration that comes with these stubborn stains, and we’re here to help you bid them goodbye for good.
In this blog post, we’ll delve into the root causes of hard water stains, give you step-by-step solutions using everyday household items, recommend commercial products for the toughest stains, and share preventive measures to keep your glass surfaces gleaming.
Understanding Hard Water Stains
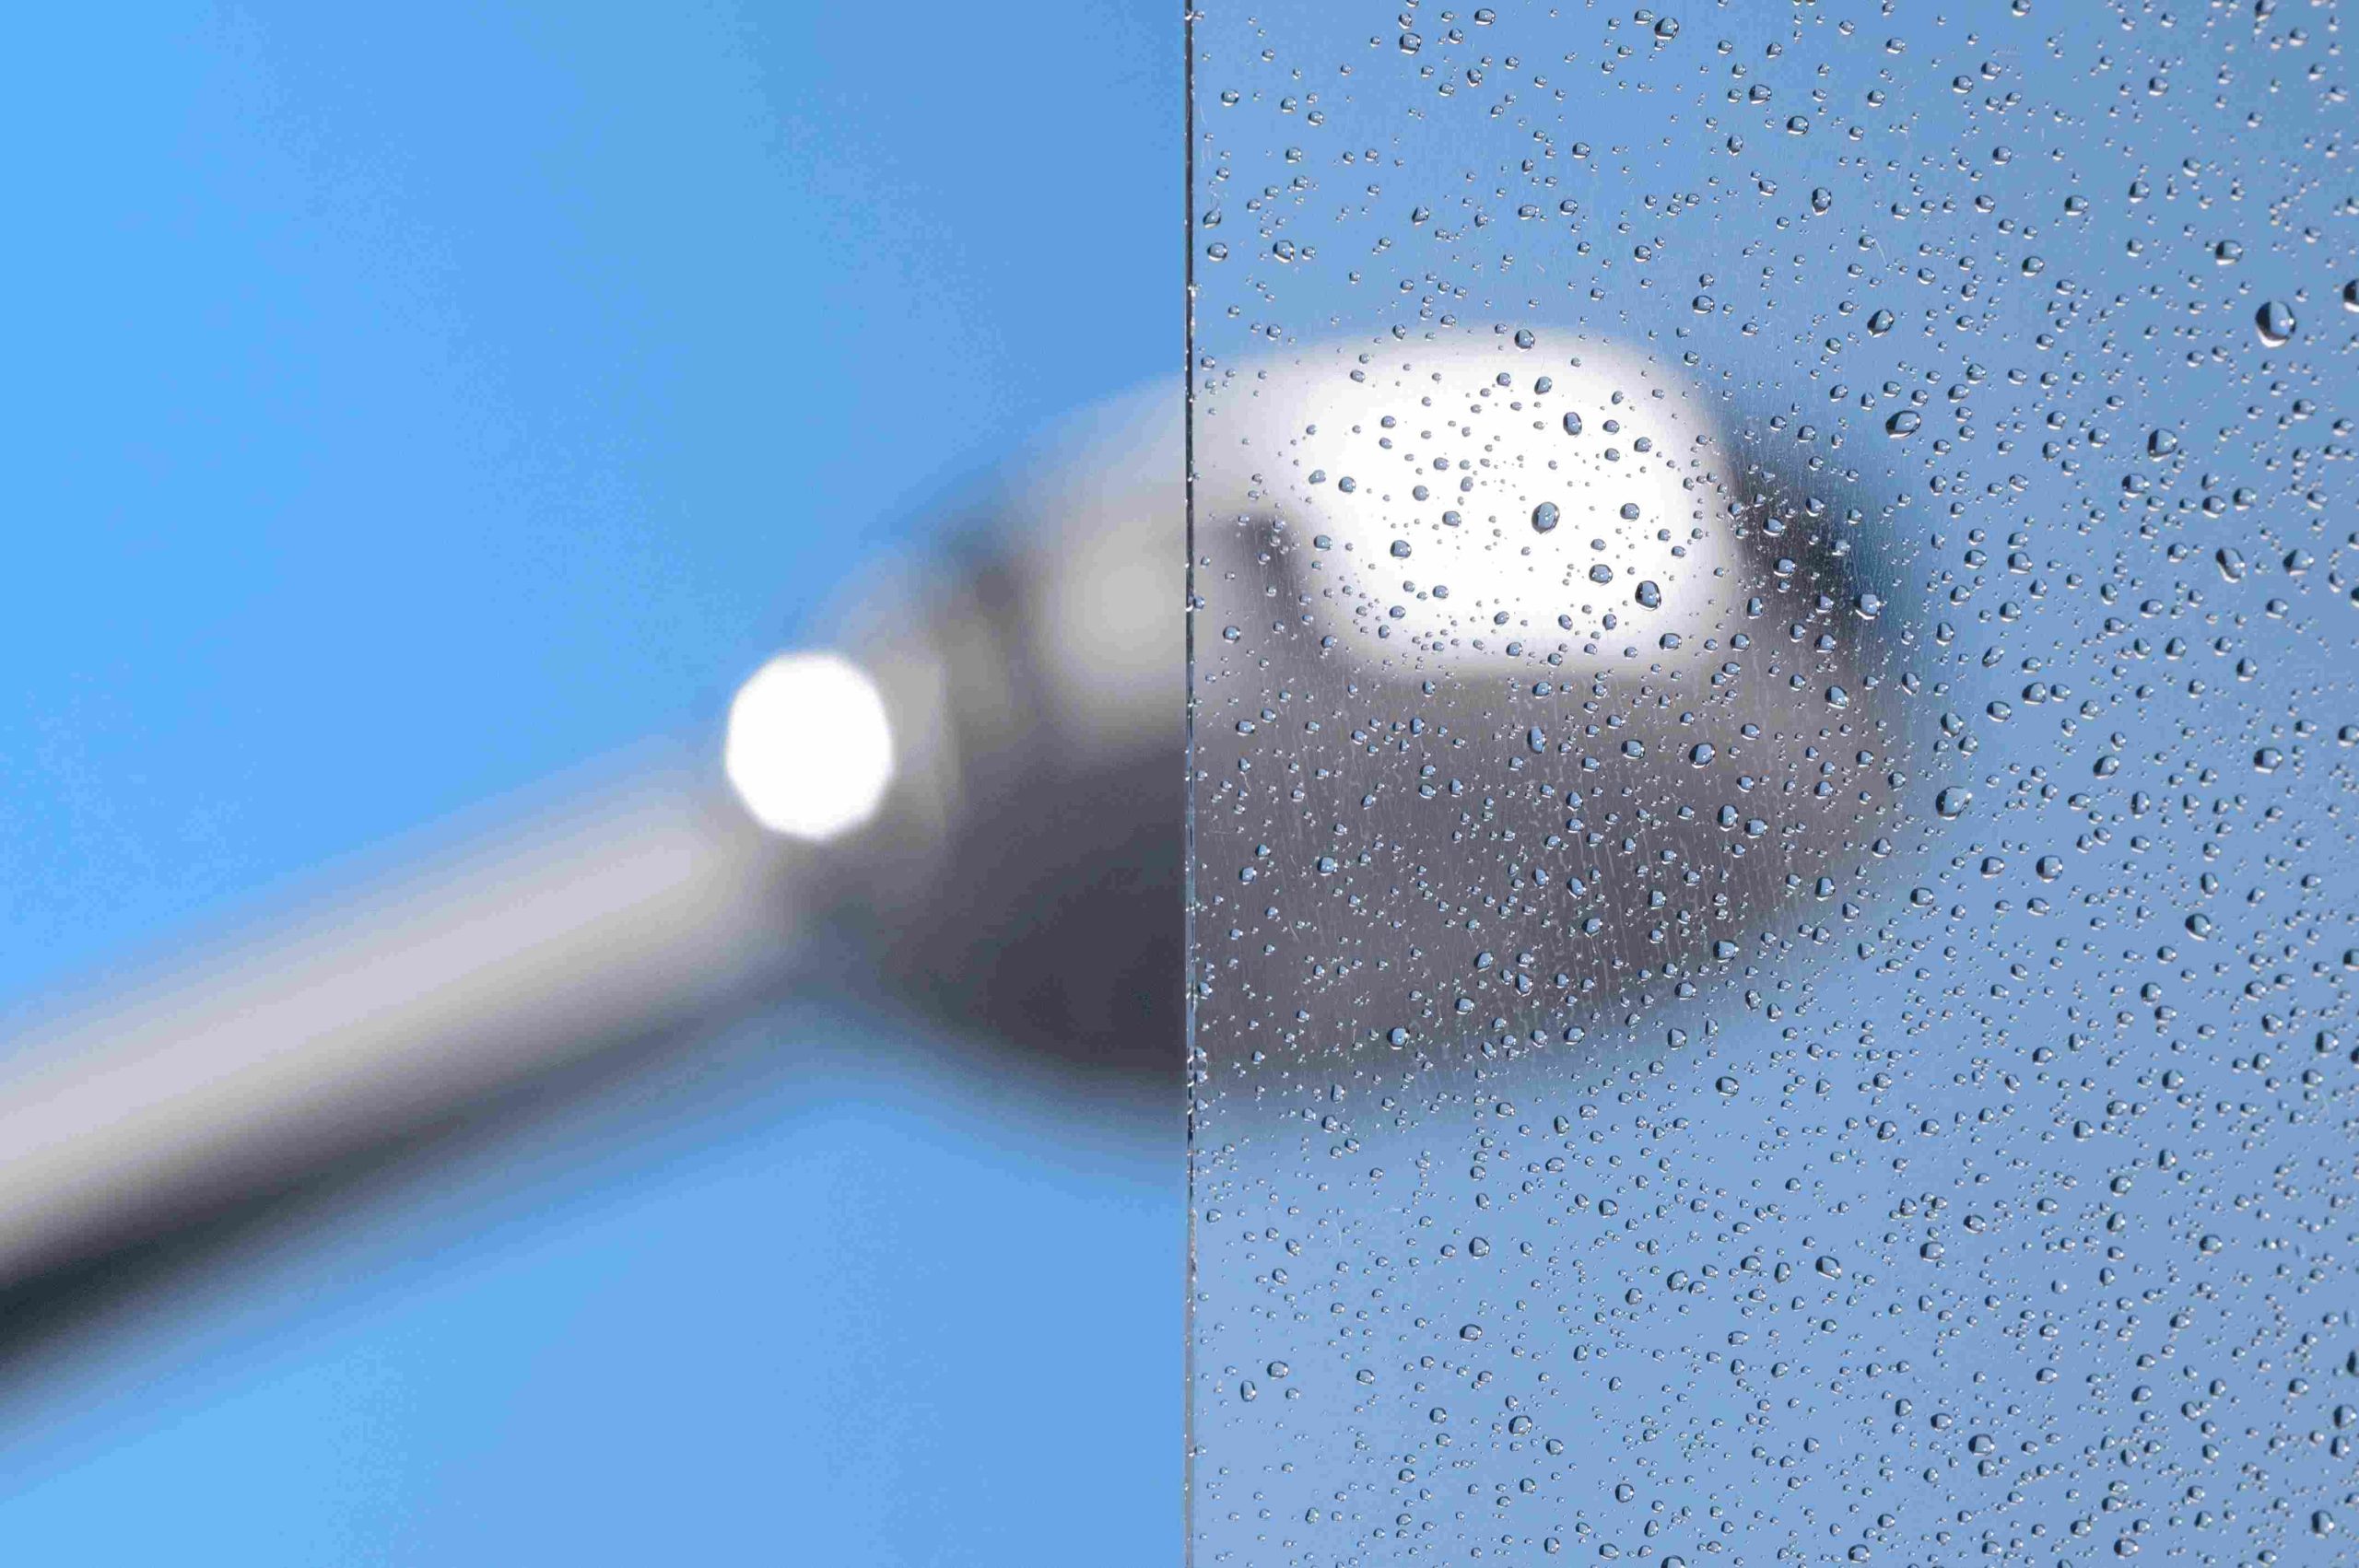
Hard water stains, often referred to as mineral deposits or water spots, occur when water with a high mineral content dries on glass surfaces, leaving behind residues.
These minerals, primarily calcium and magnesium, bond to the glass and are stubborn to remove.
Hard water stains appear as white, cloudy spots on glass, giving your windows, shower doors, and glassware an unattractive, streaky appearance.
That’s why knowing how to get rid of hard water stains will help maintain the clarity and beauty of your glass surfaces.
To learn more about the impact of hard water on your overall water quality and how our water softeners and filtration systems can help, visit our page.
Gathering the Necessary Cleaning Supplies
Before we dive into how to get water stains off the glass, let’s make sure you have all the essential cleaning supplies.
Many effective stain-removing solutions can be found right in your kitchen.
Here’s a checklist of items you’ll need:
White vinegar
Lemon juice
Baking soda
Dish soap
Microfiber cloth or sponge
Spray bottle
Soft-bristle brush
Razor blade scraper (for tougher stains)
Commercial glass cleaner (for stubborn stains)
Squeegee
For those who prefer eco-friendly alternatives, you can use vinegar, lemon juice, and baking soda.
Preventing Future Hard Water Stains
Knowing how to get rid of hard water stains is only the first step; consistent maintenance is just as important.
Here are some practical tips:
Regularly clean and dry glass surfaces to prevent the buildup of mineral deposits.
Install a water softener or filtration system to remove the mineral content in your water supply.
Invest in a squeegee for shower doors and use it after every shower to prevent water spots.
Keep microfiber towels handy to quickly wipe down glass surfaces after use.
How to Remove Hard Water Stains with Vinegar?
Vinegar is a household hero when it comes to how to get water stains off the glass. Follow these steps for a great natural cleaning solution:
Preparing the Vinegar Solution
In a spray bottle, combine equal parts white vinegar and water.
Add a small amount of dish soap to the mixture for more cleaning power.
Application and Scrubbing Technique
Spray the vinegar mixture onto the stained glass surface.
Let the solution sit for a few minutes, giving it time to dissolve the mineral deposits.
Use a soft-bristle brush, microfiber cloth, or sponge to scrub the stained area gently.
Rinsing and Drying
Rinse the glass surface with clean water to remove the vinegar solution and loosened mineral deposits.
Dry the glass using a microfiber cloth or squeegee to prevent new water spots from forming.
Lemon juice and baking soda combine to create a natural, acidic paste that helps break down hard water stains – another solution for those wondering how to get hard water off glass.
Mix lemon juice and baking soda to form a paste with a toothpaste-like consistency.
Spread the paste onto the stained glass surface, focusing on the affected areas.
Use a soft-bristle brush or cloth to gently scrub the paste into the stains.
Rinse thoroughly with water and dry with a microfiber cloth or squeegee.
Commercial Cleaners for Stubborn Stains
Most hard water stains are stubborn, and if you’re wondering how to get water stains off the glass with the help of commercial cleaning products, keep reading.
Here are some recommendations:
Look for glass cleaners specifically designed to remove hard water stains. These products are formulated to tackle tough mineral deposits.
Purchase pads that are designed for scrubbing away hard water stains without scratching the glass.
Always follow the usage instructions provided on the product label for best results.
Our Rayne Water VIP Program ensures your system is performing at peak efficiency. Join today.
Using a Homemade Paste for Stain Removal
If you prefer a DIY approach, you can create an effective homemade paste using common household ingredients:
Combine baking soda and water to create a paste.
Spread the paste onto the stained glass surface.
Use a soft-bristle brush or cloth to gently scrub the paste into the stains.
Rinse thoroughly with water and dry with a microfiber cloth or squeegee.
Special Techniques for Shower Doors
When learning how to get water stains off the glass, especially your shower doors, take note of these easy methods:
Preventing and Minimizing Future Hard Water Stains
After each shower, use a squeegee or microfiber towel to remove excess water from the glass.
Apply a water-repellent coating to the glass to reduce the adhesion of mineral deposits.
Hard Water Stain Removal from Glass Shower Doors
For stubborn hard water stains on glass shower doors, follow these techniques:
Apply the vinegar and dish soap solution as we described earlier, focusing on the stains.
For tougher stains, use a razor blade scraper at a 45-degree angle to carefully scrape away the deposits. Be gentle to avoid scratching the glass.
Stubborn stains may require multiple applications and gentle scraping.
Preventing Soap Scum Buildup
Here are tips to reduce soap scum:
Opt for soap products that are less likely to leave residues on glass doors.
Clean glass shower doors regularly to prevent soap scum buildup.
Just like a car needs oil and regular maintenance to perform its best, so do your water softener, conditioner, and reverse osmosis systems. Join the Rayne Water VIP Program today for exclusive offers on our services.
Finishing Touches: Polishing and Preventive Maintenance
Wondering how to get water stains off the glass in the future? These steps ensure a polished finish and long-term maintenance:
Use a clean, dry microfiber cloth to polish the glass for a sparkling finish.
Continue with your chosen preventive measures to keep glass surfaces stain-free.
For any questions or additional assistance, please feel free to contact us.
Rayne Water has been providing clean water since 1928. Whether you need a residential water softening system for hard water problems or a water filtration treatment system for your commercial use, we have it all.
FAQs
What causes hard water stains on glass?
Hard water stains, also known as mineral deposits or water spots, are caused by the presence of minerals, particularly calcium and magnesium, in your tap water. When water with a high mineral content evaporates on glass surfaces, these minerals are left behind. Over time, these mineral deposits accumulate, resulting in the characteristic white, cloudy stains on the glass.
Can I prevent hard water stains from forming?
Yes, consistently clean and dry glass surfaces after water exposure. This prevents the minerals from drying onto the glass and forming stains. Installing a water softener or filtration system will reduce the mineral content in your water supply. The water coming into contact with your glass surfaces will have fewer minerals, decreasing the chances of stains.
How do I use vinegar to remove hard water stains from glass?
In a spray bottle, combine equal parts white vinegar and water. Spray the vinegar solution onto the stained glass surface, ensuring the stains are well-covered. Allow the solution to sit for several minutes, giving it time to dissolve the mineral deposits effectively. Use a soft-bristle brush, microfiber cloth, or sponge to gently scrub the stained area. Rinse the glass surface thoroughly with clean water to remove the vinegar solution and the loosened mineral deposits. Finally, dry the glass using a microfiber cloth or squeegee to prevent new water spots from forming.
What are some commercial products for removing tough hard water stains?
Look for glass cleaners that specifically mention the removal of hard water stains on their labels. These products are designed to break down and dissolve mineral deposits effectively. Calcium, lime, and rust removers are highly effective at tackling tough mineral deposits. They are available in various forms, such as sprays and gels, and can be used on glass surfaces.
How can I prevent soap scum buildup on glass shower doors?
Opt for soap products that are less likely to leave residues on glass doors.
Consider using liquid soaps instead of bar soaps.
Clean your glass shower doors regularly with a glass cleaner or a solution of vinegar and water.
We all want our laundry to come out looking and feeling clean and fresh.
But did you know that the type of water you use can have a big impact on your laundry?
In this blog post, we’ll explore the effects of hard water laundry, from the deterioration of fabric quality to the formation of stains, and give solutions to ensure your clothes always look their best.
Understanding Hard Water in Laundry
Hard water contains a high concentration of minerals, primarily calcium and magnesium ions. These minerals naturally occur in the ground and find their way into your water supply.
The difference between hard and soft water in laundry is how these minerals interact with your clothes during the washing process.
Unlike soft water, which is free from excessive mineral content, hard water can cause several issues in your hard water and laundry routine.
Why is Deterioration of Fabric Quality a Factor?
One noticeable effect of hard water on laundry is the deterioration of fabric quality. The minerals in hard water will cause signs of wear, fading, and reduced fabric life.
Interaction of Minerals with Fabric Fibers
To understand hard water laundry better, let’s learn how hard water minerals affect your fabrics.
When your clothes are exposed to hard water, these minerals form chemical bonds with the fibers.
Over time, this leads to fiber degradation and weakening, making your clothes more prone to damage.
Abrasive Effect of Hard Water Minerals
Think of hard water minerals as tiny abrasive particles. They act like sandpaper on your fabrics, causing fraying and thinning. This is one of the reasons for the increased wear and tear on clothes washed in hard water.
Increased Wear and Tear
Mineral buildup causes wear and tear on clothes. Fabrics become less resilient, and their overall lifespan is shortened.
The Effects of Residue and Soap Scum
Hard water doesn’t play nice with soap. When soap interacts with hard water, it doesn’t lather well, leaving soap scum forming on your clothes.
This residue can be a pain, affecting both the cleanliness and the feel of your clothes.
Rayne Water has been providing clean water since 1928. Whether you need a residential water softening system for hard water problems or a water filtration treatment system for your commercial use, we have it all.
The Impact of Stiffness and Rough Texture
Hard water changes the feel of your washed clothes, leaving them stiff and less comfortable to wear – a common concern in hard water laundry scenarios.
Mineral Residue on Fabrics
The minerals cling to your clothes even after they’ve been rinsed. After washing, you’ll feel like you’re wearing clothes starched with sandpaper.
Reduced Comfort and Wearability
The discomfort caused by stiff and scratchy clothes, especially in hard water laundry situations, is a real downer. It’s not just about aesthetics; it affects the overall wearability of your garments.
Softening Techniques
To tackle the stiffness caused by hard water laundry, we’ve got some tricks up our sleeves.
Use fabric softeners, vinegar, or other additives in your laundry routine – these products help fight the effects of hard water minerals and leave your fabrics feeling softer.
Fading of Colors as a Resultant
Hard water and laundry issues are not limited to the feel of your clothes; they also take a toll on the vibrant colors of your garments.
The minerals in hard water are particularly harsh on dyes and pigments. They weaken the bonds between the color molecules and the fabric, causing colors to fade more quickly than they would in soft water.
Reduced Efficiency of Detergents
When combining hard water and laundry, remember that detergents play an important role in removing dirt and stains from your clothes.
However, hard water can reduce the effectiveness of detergents because the minerals in the water will react with the detergent molecules, forming insoluble compounds.
This means you will need to use more detergent than you would with soft water.
Our Rayne Water VIP Program ensures your system is performing at peak efficiency. Join today.
Challenges and Difficulties in Stain Removal
Stain removal is a tricky task, especially when hard water laundry is in the mix.
Mineral Buildup and Stain Penetration
The minerals in hard water interact with stains in a way that hinders the effectiveness of stain removal agents. Instead of breaking down the stain, the minerals trap it in the fabric, making it harder to remove, a common concern in hard water laundry.
Persistent Stains in Hard Water
Some stains are more stubborn than the rest. To tackle them, they’ll need alternative methods and special stain removal techniques.
Preventing Set-In Stains
To prevent stains from setting in due to hard water, quick action is key. As soon as you see a stain, it’s important to handle it right away.
Pre-treating the stain and using the right stain removal agents will make a world of a difference.
Just like a car needs oil and regular maintenance to perform its best, so do your water softener, conditioner, and reverse osmosis systems. Join the Rayne Water VIP Program today for exclusive offers on our services.
Bottom Line
Moreover, hard water can deteriorate fabric quality, cause stains, and result in color fading. But with the right knowledge and solutions in place, you can overcome these hard water laundry challenges and enjoy fresh, clean clothes every time you do your washing.
If you’d like to explore water-softening solutions or have more questions about dealing with hard water laundry, don’t hesitate to contact us.
FAQs
Can I use regular detergent in hard water?
Yes, you can use regular detergent in hard water, but be mindful of a few things. Hard water contains minerals that interfere with the cleaning process, making it less effective. As a result, you may need to use a larger amount of detergent to compensate for this reduced cleaning power. However, an even better approach is to opt for a detergent specifically formulated for hard water conditions. These detergents contain additives that help counteract the effects of minerals, ensuring your clothes come out clean and fresh without the need for too much detergent use.
What is the impact of hard water on my washing machine?
Hard water contains minerals that gradually accumulate inside the machine’s parts, including the pipes, hoses, and even the heating elements. Think of it as a slow clogging process. Over time, these deposits can make the machine work harder. What does this mean for you? Your machine will take more time to complete a wash, consume extra power, and not clean your clothes as efficiently. You might even find yourself adding more detergent to get that fresh feel for your clothes.
Are there eco-friendly options for dealing with hard water in laundry?
Certainly! There are green detergents specially designed to perform well in hard water. These products typically have a reduced chemical footprint, making them kinder to our planet. Simple household items, such as white vinegar or baking soda, can also be added to your wash cycle. They act as natural softeners, helping not only to counteract the effects of hard water but also to leave your clothes feeling softer and fresher. By choosing these alternatives, you’re making a sustainable choice for both your laundry and the environment.
Can hard water cause skin irritation from laundry residues?
Yes, hard water can potentially lead to skin irritation when residues are left on clothes after washing. The mineral residue from hard water makes clothes feel stiff and scratchy, which, when worn directly against the skin, will cause discomfort or irritation, especially for people with sensitive skin. To reduce the risk of skin irritation, it’s best to use fabric softeners or natural alternatives like vinegar in your laundry routine. These products help neutralize the mineral residues, leaving your clothes feeling softer and more comfortable against your skin.
How can I prevent hard water stains on my laundry?
Preventing hard water stains on laundry involves a few strategies. Firstly, consider using a detergent specifically designed for hard water, as these detergents contain additives to combat the effects of minerals and reduce staining. You can also install a water softener in your home to reduce the hardness of the water you use for laundry. Another tip is to quickly address any hard water stains on laundry you notice on your clothes, using appropriate stain removal techniques and agents. Quick action will prevent stains from setting in and becoming more challenging to remove.
We often take our household appliances for granted, expecting them to function perfectly day in and day out.
Many homeowners don’t realize that the quality of water flowing through their pipes determines the efficiency and lifespan of these devices.
In this guide, we’ll delve into the effects of combining hard water and appliances, exploring how hard water interacts with different household devices, and more.
An Overview of Hard Water On Appliances
Hard water is a term used to describe water that has a high concentration of minerals, mainly calcium and magnesium ions.
While these minerals aren’t bad for our health, they damage our appliances over time.
Its effects go beyond just the visible scale buildup; it hinders the performance and efficiency of these devices.
Rayne Water has been providing clean water since 1928. Whether you need a residential water softening system for hard water problems or a water filtration treatment system for your commercial use, we have it all.
Formation of Scaling in Dishwashers: Does Hard Water Damage Appliances?
One common appliance affected by hard water is the dishwasher.
The formation of limescale within the dishwasher affects both its cleaning performance and lifespan.
Limescale is the result of mineral deposits, accumulating on the interior components of the dishwasher.
Over time, this buildup will delay the flow of water, reduce the effectiveness of detergent, and even clog the spray arms.
As a result, your dishes don’t come out as clean, and your dishwasher may require more maintenance.
The Impact of Hard Water on Washing Machines
Washing machines are another appliance vulnerable to the effects of hard water.
The presence of mineral deposits can affect both the efficiency of the machine and the condition of your clothing.
While this isn’t harmful to you, it doesn’t look very nice and could spoil your outfit for the day!
At Rayne Water, our water softeners will treat hard water and save you money from the very moment you begin to use them.
Mineral Buildup in Washing Machine Components
Inside a washing machine, hard water minerals build up in different areas, including the drum, heating element, and pipes.
The result? Less water flow, lower heating efficiency, and even damage to the machine’s internal parts.
Reduced Cleaning Power
The minerals in hard water make detergents less effective, leaving behind stains and residues on washed clothing.
Increased Wear and Tear on Clothing
The abrasive nature of mineral deposits on fabrics will cause them to wear out more quickly.
This emphasizes the hard water effects on appliances, specifically how it impacts the washing machine and your clothing.
If your clothes are constantly exposed to hard water, you’ll likely find yourself replacing them sooner than you think.
Understanding Water Heater Efficiency
Hard water takes a toll on your water heater, which translates to a higher utility bill.
As hard water flows through your water heater, the minerals settle and collect on the heating element.
This insulating layer of scale makes it harder for the heating element to transfer heat to the water, meaning more energy consumption and longer heating times.
Why Do Faucets and Showerheads Clog?
Even the fixtures that deliver water to us suffer from the effects of hard water.
Mineral buildup in faucets and showerheads reduces water flow and pressure, creating annoying clogs. This is one of the many hard water effects on appliances and household fixtures.
Regular cleaning and maintenance are essential to keep these fixtures functioning optimally.
The Rayne Water VIP Program ensures your system is performing at peak efficiency. Join today.
Coffee Maker and Kettle Scaling
For those who enjoy a morning cup of coffee or tea, hard water may change the taste of your drinks and the longevity of your coffee maker and kettle.
Effects and Impact of Hard Water on Ice Makers
Got an ice maker in your freezer? Hard water can result in scaling within the ice maker. This affects the quality of ice you use for your drinks.
It’s crucial to grasp the connection between hard water and appliances, especially when it comes to your ice maker’s performance.
The Deterioration of Appliance Lifespan
When connecting hard water and appliances, one of the most concerning aspects is its potential to shorten their lifespan.
Scaling and Component Damage
Mineral buildup accelerates wear and tear on key components of appliances. Over time, this will require expensive repairs or the need to replace the appliance altogether.
Energy Efficiency and Utility Costs
Inefficient appliances, worn down by the effects of hard water, will likely consume more energy. As homeowners, we want to maximize our appliances’ efficiency and minimize operating costs.
Appliance Maintenance and Longevity
To ensure the longevity of your appliances in hard water areas, learn to be proactive.
Regular cleaning and maintenance help prevent and address the effects of hard water. This includes descaling appliances, replacing worn-out parts, and following manufacturer guidelines for upkeep.
By following a consistent maintenance routine and addressing issues right away, you’ll protect your appliances, extend their lifespan, and minimize the impact of hard water and appliances on your household.
Just like a car needs oil and regular maintenance to perform its best, so do your water softener, conditioner, and reverse osmosis systems. Join the Rayne Water VIP Program today for exclusive offers on our services.
Solutions for Mitigating Hard Water Effects
Water softeners are perfect for tackling the issues of combining hard water and appliances.
There are also other steps you can take to extend the lifespan of your appliances, including regular maintenance, using appropriate detergents, and following manufacturer recommendations.
Bottom Line
Moreover, the effects of hard water and appliances are far-reaching and costly. From dishwashers and washing machines to water heaters and coffee makers, the impact is felt throughout your home.
But with the right knowledge and measures, you can ensure your appliances serve you well for years to come.
Remember, addressing the question “Does hard water damage appliances?” is essential for maintaining the functionality of your household devices.
Take action today to protect your investments and enjoy the benefits of efficient, long-lasting devices. If you have any questions or need assistance with water treatment solutions, please contact us.
FAQs
What is hard water, and how does it affect appliances?
Hard water, characterized by high levels of minerals like calcium and magnesium ions, is a common issue in households. While safe to drink, hard water wreaks havoc on household appliances. As it courses through devices such as dishwashers, washing machines, and water heaters, it leaves behind mineral deposits, often called limescale.
Does hard water damage appliances?
Yes, hard water damages appliances over time. The consequences of hard water damage include poor performance, higher energy consumption, and a shortened lifespan for your appliances.
How does hard water affect washing machines?
Hard water can have noticeable effects on washing machines. When you use hard water in your machine, the minerals, especially calcium and magnesium, stick to its parts like the drum and heating elements. Over time, these deposits build up and start causing issues. For instance, if the water inlet valve gets clogged with these minerals, the machine might take longer to fill up with water. Similarly, draining becomes slower. In the long run, this will wear out the machine faster and require expensive repairs or replacements. Always keep an eye on how your machine functions and consider water softening solutions to help avoid these issues.
Do water softeners really work in preventing hard water damage to appliances?
Yes, water softeners are great at preventing hard water damage to appliances. A water softener removes the calcium and magnesium ions responsible for water hardness, replacing them with sodium or potassium ions through a process called ion exchange. By reducing the mineral content in your water, water softeners prevent limescale buildup in appliances. This not only enhances the performance and efficiency of your appliances but also extends their lifespan. Water softeners are a great solution to fighting hard water effects on appliances throughout your home.
What can I do to prolong the lifespan of my appliances in a hard water area?
First and foremost, regular maintenance is essential. This includes descaling appliances, cleaning filters, and following manufacturer-recommended maintenance schedules. Additionally, using detergents and cleaning products designed for hard water is helpful. Installing a water softener is a highly effective long-term solution, as it reduces the hardness of the water at the source, protecting all appliances in your home. Lastly, staying informed about the water quality in your area and taking proper measures, such as periodically checking for limescale buildup, can go a long way in ensuring the longevity of your appliances.
Are you thinking about installing a water softener? If you’re tired of dry skin, soap scum, and mineral buildup around your home, this upgrade can make a real difference. A water softener removes the hardness from your water, improving how it feels, cleans, and flows through your pipes.
But before you get started, it’s important to know that a water softener installation typically requires a licensed plumber.
DIY might sound tempting, but a pro keeps things safe and up to code. This guide covers how to fit a water softener and when it makes sense to tackle the job yourself.
Key Takeaways
Professional water softener installation ensures your system performs efficiency, protects your plumbing, and extends the lifespan of your appliances.
Choosing the right water softener system installation starts with testing your water and sizing your unit for your household’s needs.
Understanding how to fit a water softener properly makes maintenance easier, helping you catch small issues before they become bigger, costlier problems.
Soft water means fewer limescale buildups, brighter laundry, and a smoother feel on your skin after every shower.
A reliable water softener system installation can even help you save on energy bills by keeping your hot water heater running at its best.
Don’t skip professional advice. Certified experts guarantee your water softener installation meets local codes and delivers the results you expect.
What Is a Water Softener and Why Install One?
Hard water can quietly damage your home’s plumbing and appliances. A water softener protects your home by removing excess minerals, mainly calcium and magnesium, that cause water hardness. These minerals can build up in pipes, reduce the efficiency of appliances, leave spots on dishes, and make soap less effective.
At the heart of a water softener is a resin tank filled with resin beads. These beads attract and trap the hardness minerals from your water.
When the beads become saturated, a regeneration cycle cleans them by flushing out the minerals using a brine solution, usually made with salt.
With the right water softener installation, you turn every tap into a source of softer, cleaner water.
So why do you need to install one? A water softener can:
Extend the lifespan of your appliances and plumbing by reducing scale buildup.
Enhance the effectiveness of soaps and detergents, leading to cleaner dishes and softer laundry.
Improve the efficiency of your water heater, saving you money on energy bills.
Make your skin and hair feel smoother and cleaner.
Reduce the time and effort required for cleaning.
To get the most out of this system, it’s best to have your water softener installed by a licensed professional who can ensure everything works properly and meets local code. Rayne Water offers a range of top-notch water softeners designed to make your life easier.
Signs Your Water Softener Needs Replacing
Your water softener system plays a quiet but important role. Over time, though, you may notice little changes that signal something’s wrong. Hard water stains appear again. Soap feels less effective, and your skin doesn’t feel as smooth. These are all signs your water softener installation could be due for an upgrade.
Common signs your system is failing:
You see white spots on dishes and glasses, even after cleaning
Laundry feels stiff or looks dull
Water pressure drops or fluctuates
Salt levels seem off, or you’re refilling much more often
The system makes odd noises or runs more frequently
When it’s time for a new water softener installation, you’ll need to safely remove the old system.
Before installing a new water softener, any existing system should be fully disconnected. This typically involves turning off the main water supply, draining any remaining water, and carefully removing the pipes and bypass valve.
Once the old unit is removed, the plumbing can be prepared for the new softener. At this point, installation can begin, and the home can start benefiting from softened water.
How to Choose the Right Water Softener for Your Home
A successful water softener installation starts with choosing the right system for your unique needs. Before you buy, take a closer look at your water quality and household habits. The right water softener system installation saves money, protects appliances, and keeps your home running smoothly. Here’s how to fit a water softener that’s perfect for your space.
Measure Your Water Hardness
Before selecting a water softener, you need to know your water’s hardness level.
Use a water test kit or contact your local water utility to find your water’s grain-per-gallon (GPG) measurement. Knowing this number helps you select a system that truly matches your needs.
This information is usually available from your local water utility or can be obtained through water testing kits.
Calculate Your Household Water Usage
Matching the water softener’s capacity to your household’s needs is crucial for efficient operation.
Multiply the number of people in your home by the average daily water use (about 75 gallons per person) to estimate your total demand.
Factors like the number of residents, bathrooms, and appliances that will be using the softened water should also be considered. Undersized units might regenerate too frequently, while oversized units could lead to wastage.
Types of Water Softeners
There are two primary types of water softeners: salt-based and salt-free. And each has its pros and cons.
Salt-based water softeners use ion exchange to remove minerals and are highly effective. On the other hand, salt-free systems use alternative methods like template-assisted crystallization to prevent minerals from adhering to surfaces.
You’ll also find dual-tank systems for uninterrupted soft water and compact softeners made for small homes or RVs. Each system requires a specific water softener installation process, so choose one that fits both your home and your plumbing setup.
Consider your preferences and household needs when choosing the right system. If you’re looking for a long-term solution, our whole-house water softeners are a popular choice. Learn more about them here.
Additional Features and Efficiency Considerations
Modern water softeners come with a range of features to enhance convenience and efficiency. For instance, digital controls allow you to customize settings easily, while dual-tank systems ensure a continuous supply of soft water even during regeneration.
You could also compare regeneration frequency, efficiency ratings, and potential water waste to select the best water softener system installation for your home. Smart features make maintenance easier and help you get the most from your investment.
Other crucial factors to consider include the water softener’s efficiency, regeneration frequency, and wastage.
Tools and Materials You’ll Need for Installation
Preparation is everything. A smooth water softener installation depends on having the right tools and materials within arm’s reach. Gathering your parts before starting helps prevent mistakes and avoids time-consuming trips to the hardware store.
When every piece is ready, your water softener system installation is faster, cleaner, and less likely to cause leaks. For extra convenience, download our printable checklist to keep your project organized.
To get started, you’ll need the right tools and materials for the installation. Here’s a handy list:
Adjustable wrench
Pipe cutter
Tubing cutter
Pipe wrench
Screwdriver
Pipe and tubing cutter
Compression fittings
Copper or PVC pipes
Copper or PVC connectors
Shut-off valves
Bypass valves
Teflon tape
Pipe joint compound
With all these items in place, you’re ready to learn how to fit a water softener correctly and confidently.
Where to Install Your Water Softener
Ideal Placement in the Home
A successful water softener installation starts with picking the right location. Start by placing the system near your home’s main water line entry. This ensures every tap receives softened water and reduces the risk of mineral buildup in your plumbing. It would also help if you choose a spot close to a power source and a reliable drain for the regeneration cycle.
Proximity to the Main Water Supply Entry
Installing the water softener near the point of entry for your home’s main water supply offers several benefits. It ensures that all the water entering your home is treated, providing consistent soft water to every tap. This location also minimizes the chances of mineral buildup in your plumbing system.
Availability of Drainage
A water softener needs a nearby drain to handle the wastewater produced during its regeneration cycle. This process flushes out accumulated minerals, and that discharge must go somewhere safe and reliable.
Plan for a secure connection to a floor drain, utility sink, or standpipe to avoid leaks, backups, or clogs.
Avoid locations exposed to freezing or excessive heat, as these conditions can damage your system and shorten its lifespan.
Indoor vs. Outdoor Installation
Indoor installation offers protection from extreme temperatures and weather conditions, but it requires sufficient space and proper ventilation. Outdoor installation might be more space-efficient, but you’ll need to shield the unit from the elements.
If you choose an outdoor spot, insulate and protect the softener from the sun, rain, and cold. And no matter where you install it, leave enough room to refill salt, service the system, and handle any future repairs. Knowing how to fit a water softener in the right place can save time and avoid costly issues later.
Space and Accessibility
Ensure there’s enough space for the water softener and its components.
This includes providing adequate clearance for maintenance tasks, such as refilling the salt and servicing the unit. Easy access to the unit will make your life much easier in the long run.
For a comprehensive selection of water softeners, visit our Residential or Commercial page.
Step-by-Step Guide to Installing a Water Softener
A smooth water softener installation starts with careful prep. Setting up your system step by step protects your plumbing and ensures long-lasting performance. Use this guide to master your water softener system installation and avoid common mistakes.
Step 1 – Shut Off Water and Drain System
Now that you’ve selected the ideal location, it’s time to assemble the water softener components. Turn off the main water supply to your home and open all faucets to release pressure from the system.
Follow the manufacturer’s instructions carefully to ensure everything is connected correctly.
Step 2 – Cut Into the Main Supply Line
This usually involves setting up the brine tank, connecting the control valve, and attaching the resin tank. Use a pipe cutter to cut into your main water supply at the spot chosen for the water softener installation. Prep the ends and attach shut-off and bypass valves to control water flow.
Step 3 – Connect the Inlet and Outlet Ports
Installing bypass valves allows you to divert water around the softener during maintenance or emergencies. Match the direction of water flow and use compression or push-to-connect fittings to ensure a watertight seal.
Installing these valves correctly ensures you can temporarily disable the water softener without disrupting your water supply.
Step 4 – Connect the Drain Line
Connecting the water softener to your plumbing system requires precision to avoid leaks and ensure proper water flow. Connect the drain line to a floor drain, utility sink, or standpipe. Always use an air gap fitting to prevent contamination.
Follow these steps for a successful connection:
Turn off the main water supply to your home to prevent water from flowing during installation.
Use a pipe cutter to cut the main water supply pipe at the designated location for the water softener.
Attach the necessary fittings to the cut ends of the pipe.
Connect the water softener’s inlet and outlet pipes to the fittings, using appropriate connectors and sealants.
Turn on the main water supply and check for leaks, tightening fittings as needed.
Step 5 – Connect the Overflow Line (Brine Tank)
For safety, route the brine tank’s overflow line to the same drain as the regeneration discharge. This backup prevents water damage if the brine tank overflows.
Step 6 – Plug It In and Fill the Brine Tank
Plug in the water softener and fill the brine tank with salt. Always follow your manufacturer’s startup guide to prepare for first use.
Step 7 – Flush and Regenerate
With the water softener successfully connected, it’s time to flush the system and initiate the initial startup:
Open all faucets in your home to flush out air and impurities from the water lines.
Let the water run for a few minutes until it runs smoothly. Initiate the regeneration cycle to prepare the resin bed for softening. Adjust settings based on your water hardness to optimize your water softener system installation.
Check all connections for leaks and make final adjustments.
Learning how to fit a water softener the right way ensures your system delivers soft, clean water to every tap.
Post-Installation: How to Program and Maintain Your System
Once your water softener is installed, a little setup and routine care go a long way. Proper programming ensures the system runs efficiently and meets your household’s needs.
Set Hardness Level and Regeneration Schedule
The first step after your water softener installation is programming your system. Set the hardness level based on your test results and match the regeneration schedule to your family’s water use. Many newer models let you select a metered setting for more efficient operation, so your water softener system installation will save salt and water over time.
Routine Maintenance Tasks
To keep your water softener operating at its best, regular maintenance is essential:
Monitor the salt level in the brine tank and refill it as needed. Insufficient salt can lead to less effective regeneration.
Occasionally, check for salt bridges, which are hardened salt layers that can block water flow. Gently break up any salt bridges you find.
Empty and clean the brine tank periodically to prevent salt buildup and keep it functioning optimally.
Troubleshooting Common Problems
Here are some common issues and how to troubleshoot them:
Water remains hard:
Check that the salt level in the brine tank is above the water level.
Inspect the resin tank for fouling or channeling, which can stop the ion exchange process. Run a manual regeneration cycle and review the control settings.
Make sure the bypass valve is in the correct position and that the system isn’t allowing untreated water through.
Low water pressure:
A clogged pre-filter or resin bed can reduce water flow. Replace or clean filters regularly.
Inspect the inlet and outlet connections for blockages or buildup.
Examine the control valve for any debris or scaling and clean as needed.
Strange taste or odor in water:
Sanitizing the brine tank and resin tank can remove bacteria or organic buildup. Run a cleaning cycle with a manufacturer-approved sanitizer.
Replace the pre-filter or post-filter if your water softener system installation includes one.
If taste persists, ensure all lines are properly flushed and no residual cleaning solution remains.
Salt bridges or mush:
Use a broom handle to carefully break up hardened salt layers and mix the salt, making sure the brine tank remains loose and able to dissolve salt properly.
Avoid overfilling the tank and use high-quality salt to prevent bridging and mushing.
Resin beads in your water:
Resin beads in the water supply usually signal a damaged resin tank or a failed internal screen. Shut off the system and contact a professional for repair or replacement.
If repeated issues occur, consult your manufacturer’s manual or contact a water softener expert for help. Knowing how to fit a water softener and maintain it properly keeps your water softener system installation running at peak efficiency.
For ongoing support, consider joining our VIP Program. It’s a simple way to get expert guidance, exclusive benefits, and peace of mind as you maintain your system over time.
Should You DIY or Hire a Pro for Water Softener Installation?
There’s a certain pride in taking on home projects yourself. But water softener installation isn’t as easy as repainting a room. It requires precision, the right tools, and a solid understanding of your plumbing. Getting it wrong can lead to costly problems, which is why professional installation is often the smarter choice.
At Rayne, we’ve helped hundreds of homeowners get their systems up and running the right way. Our customers enjoy reliable, long-lasting performance without the headaches. If you’re ready for a system that works the way it should, our certified team is here to help.
DIY Considerations
You might be tempted to install your system yourself, especially if you have some plumbing experience. A DIY water softener installation does make sense if:
You’re replacing an old unit with a similar model, using the same connections
Your home’s plumbing is straightforward and already set up for a softener
You’re comfortable with tools, pipe fittings, and working in tight spaces
DIY can save money and feel rewarding, but it’s not for everyone. The process requires precision. One missed connection or a small leak can mean bigger problems later. If you want to learn how to fit a water softener and handle each step with care, start with a thorough read of the instructions and don’t rush the details.
When to Call a Professional
Hiring a professional is often worth it if you want peace of mind and reliable results. Consider calling an expert if any of the following apply:
This is your first water softener system installation.
Your home’s plumbing layout is complex or has never housed a softener before.
You’d rather spend your weekend relaxing than wrestling with pipes and valves in a frustrating battle.
You also want the added protection of a professional warranty.
A certified installer can size your unit, set up every component with care, and ensure your water softener installation meets local codes. Professional service frees you from the guesswork.
Ready for soft water and less stress? Contact Rayne for expert installation. We provide friendly support every step of the way.
Ready to Upgrade Your Water? What’s Your Next Step?
Water softener installation is manageable when you have the right tools, a clear plan, and a bit of patience. From choosing the best water softener system installation for your needs to learning how to fit a water softener, every step brings lasting benefits for your home and family.
Now that you know how to install water softeners, enjoy the many benefits it brings to your home and lifestyle.
Softened water means comfort, cost savings, and longer-lasting appliances every single day.
You’ll protect your plumbing, keep limescale at bay, and enjoy fresher laundry and cleaner dishes. The results add up, year after year.
If you’re unsure at any stage, it’s smart to get help from a professional. Expert installation eliminates guesswork and guarantees your system performs at its best.
Get a quote here or contact us for any questions or additional support. Our team of experts will provide you with personalized recommendations based on your water quality, health concerns, and preferences.
FAQs
How long does a water softener installation usually take?
A standard water softener installation takes time. It often lasts two to four hours.
The duration also depends on your plumbing. The complexity of your setup matters too. If your home already has a system in place, things can go faster.
For new installs or tricky plumbing, a professional might need extra hours to ensure every connection is secure and meets code requirements.
What should I consider before starting a DIY water softener system installation?
Take a moment to plan before you begin. Look over your plumbing layout and read the manufacturer’s instructions carefully to avoid surprises during installation.
You’ll need the right tools, understand your water main, and be ready to shut off your home’s water supply safely. If pipe cutting or valve installation feels overwhelming, don’t hesitate to hire a professional to ensure your water softener system installation is leak-free and works reliably.
Where’s the best place to install a water softener in my home?
Choose wisely for the best results. Install your water softener near your main water supply entry. That’s typically where water first enters your house. This setup allows your entire home to benefit from softened water. Choose a location with access to a power source and a proper drain for regeneration. Make sure there’s enough space around the unit for easy maintenance, and avoid placing it outdoors where it could be exposed to extreme heat or cold.
How do I know if my water softener is working correctly after installation?
Check your system after installation. Look for softer water signs, test for fewer mineral spots on dishes, and observe if soap lathers more easily. You should also monitor your system’s salt usage and keep an eye on the regeneration cycle.
If hard water symptoms persist or water pressure drops, something might be wrong. Revisit the setup steps carefully or consult a professional to learn how to fit a water softener the right way.
Can I install a water softener myself, or should I always call a professional?
DIY installation can work if you have plumbing experience. It’s easier when swapping an old unit for a new one in the same spot. But first-time water softener system installation can be tricky.
Complex layouts add challenges. Protecting your warranty is important, too. In those cases, hiring a professional makes sense. Experts know how to fit a water softener quickly, safely, and according to local codes, saving you time and preventing expensive mistakes.
Crystal-clear water can still hide contaminants like lead, chlorine, and bacteria. That’s why more households rely on reverse osmosis systems to ensure their drinking water is truly clean. These systems are trusted for their ability to remove a wide range of impurities and deliver fresh, great-tasting water.
However, even the best filters need maintenance. Regular RO filter replacement is key to keeping your water safe and your system performing at its best.
But how long do they really last before maintenance? And when does your RO fridge filter need changing?
This guide will show you what really affects RO filter life, how to spot when it’s time to change, and how to keep your water at its best.
What Are Reverse Osmosis Filters?
Let’s start with the basics.
Reverse osmosis filters are a key component of RO systems, designed to remove impurities, contaminants, and minerals from your water supply.
These systems are widely used in homes and businesses to ensure the water you consume is safe and healthy. Every drop passes through layers of protection, stripping out what you don’t want and leaving what you do.
However, it’s important to note that RO filters don’t last forever.
Over time, the filters in your RO system will become less effective at removing impurities, potentially compromising the quality of your water. That’s why RO filter replacement is so important. Miss the moment, and your water might lose its clarity.
This leads us to the crucial question: How long do reverse osmosis filters last? Before answering this question, let’s have a look at how an RO filter works.
The Role of RO Filters in Your Water System
Every glass of clean water starts its journey somewhere. For many homes and offices, that journey runs through RO filters.
RO filters work by pushing water through a semipermeable membrane, removing up to 99% of dissolved solids and contaminants like chlorine, lead, fluoride, and nitrates. These filters are central to any RO system, forming a line of defense that ensures only clean water makes it to your tap or RO fridge filter.
A full reverse osmosis system includes several filtration stages, not just one filter. Each stage has a purpose. Sediment pre-filters catch larger particles. Carbon filters handle odors and chemicals. The RO membrane completes the purification. The result? Water that’s clear, crisp, and ready for anything.
Every stage flows together smoothly. When you pour a glass, you’re not just getting refreshment. You’re experiencing a well-choreographed process. It works quietly behind the scenes, delivering purity with every drop.
Don’t delay any more time in securing clean water for your home. Explore our range of drinking water systems.
Here’s a quick breakdown of what’s typically inside an RO system:
Pre-Filters (Carbon and Sediment): These serve as the primary shield. Sediment filters capture larger particles such as dirt and rust. Carbon filters mitigate chlorine and harmful chemicals, which can damage the membrane.
RO Membrane: This is the most important part of the system. It extracts heavy metals, salts, and dissolved solids along with other microscopic contaminants.
Post Filters: These are also referred to as polishing filters. They remove any remaining impurities to enhance the taste and clarity of water.
Optional Remineralization Brushes: Some systems add this stage to supplement essential minerals such as calcium and magnesium. They are not mandatory, but can increase the flavor and balance of water.
Getting to know more about these parts is key when scheduling RO filter replacement, as each has its own expected lifespan and maintenance needs.
How Long Do RO Filters Last?
Knowing how long each stage of your RO system lasts helps you avoid drops in water quality and unexpected issues. While no filter lasts forever, proper timing and upkeep ensure your system keeps delivering clean, safe water.
Understanding the Lifespan of Reverse Osmosis Filters
No two RO filters follow the exact same timeline. Some last a year, others just a few months. It all depends on the journey your water takes before it reaches your glass. A filter working overtime in a busy household, or guarding against tough contaminants, will wear out sooner.
Meanwhile, a system used less frequently may stretch its lifespan a bit longer.
Several factors influence how long reverse osmosis filters last, including:
Water quality and source: If your water comes packed with sediment, chlorine, or heavy metals, your filters will need to work harder. Heavily contaminated water means more frequent filter changes.
Frequency of system use: The more you use your RO system, the faster the filters reach capacity. A system running daily for a large family or busy office will require filter changes more often than one used only occasionally.
Environmental factors: The environment around your system matters, too. High temperatures or humidity can affect how well your filters perform. In extreme conditions, you may notice their lifespan gets shorter.
By paying attention to these variables, you’ll know exactly when your filters need a swap. This keeps your water clean and your system running at its best, every single day.
Average Lifespan by Filter Type
In an RO system, multiple types of filters work together to purify water.
The pre-filters have a life expectancy of 6 to 12 months and are important in preventing the sediment and larger particles from reaching sensitive parts like the RO membrane.
The RO membrane itself depends on water quality and maintenance, but can vary from 2 to 5 years. Post-filters or polishing filters can then be expected to maintain great taste, and the last stage of filtration, and should be replaced every 12 months.
If your system includes an RO fridge filter, the lifespan could be the same as post-filters, needing replacement every 6 to 12 months based on usage and brand.
Factors That Influence Filter Lifespan
Several external and internal factors affect how long your RO filters last:
Water source and quality: Well water comes with a lot more sediment and minerals, which will increase the rate of filter wear in comparison to municipal water.
How often is the system used: Houses and commercial buildings that get a lot of water usage on a daily and weekly basis are bound to have faster filter depletion.
Surrounding conditions: Factors like high temperatures, excessive humidity, and lack of proper ventilation affect the RO system’s filter life and efficiency.
Skipping the replacement schedule of your RO filter can lead to unsafe drinking water and irreversible damage to your system.
Signs It’s Time to Replace Your RO Filters
Every reverse osmosis system has its rhythm. Stick to the schedule, and your water stays clean. Miss a beat, and quality slips sometimes before you even notice.
To ensure your RO system consistently provides clean water, it’s crucial to follow recommended replacement schedules for each filter.
Ignoring these schedules can lead to a decline in water quality. So, when should you change your filters?
Pre-Filters and Sediment Filters: Every 6 to 12 months
Carbon Filters: Every 6 to 12 months
Post-Filters: Annually
But don’t just watch the calendar. Listen to your system, too. Here are key indicators that it might be time for RO filter replacement:
Drop in water pressure: A noticeable reduction in flow rate often means filters are clogged or the RO membrane is blocked.
Changes in water taste, color, or odor: If your water starts tasting metallic, smells off, or appears cloudy, your filters may no longer be effectively removing contaminants.
Indicator lights (if the system has them): Some modern RO systems have built-in alerts or lights that notify you when filters need changing.
Water testing fails: High total dissolved solids (TDS) levels from a handheld meter or failed lab tests are clear signs that your RO filters or membrane are no longer performing.
Visual buildup or wear on physical filters: Discoloration, debris buildup, or visible damage to your pre- or post-filters can signal it’s time for replacement, especially in high-use or poor-water-quality environments.
RO filter replacement schedules offer a solid baseline, but these real-world signs are your backup plan. Together, they help keep your system safe, efficient, and always delivering the quality you expect.
Maintenance Tips to Extend RO Filter Life
To get the most out of your reverse osmosis filters and extend their lifespan, consider these best practices.
Regular Cleaning and Inspection
Periodically clean the filter housings to prevent sediment buildup, which can reduce filter efficiency. Regularly inspect your system for signs of damage or sediment accumulation that may affect filter performance.
In addition to the housing, consider wiping down surrounding areas and sanitizing the RO storage tank at least once a year. This prevents bacterial growth and keeps the entire system running efficiently.
Monitoring Water Usage and Filter Performance
Every household tells a different story. Maybe yours is busy, with faucets running and filters working hard.
Maybe it’s quieter, but your system still feels the strain when guests arrive or seasons change.
No matter which household you are, keep an eye on your water usage to adjust replacement schedules accordingly. Increased usage may require more frequent filter changes. Notice any changes in water taste, color, or pressure, as these can be indicators that it’s time to replace filters.
As household size or water demands change, your RO filters may be under more stress.
Monitoring gallons used can help you better estimate when an RO filter replacement is due, especially for RO fridge filter setups that see daily use.
Proper Pre-Filter Care
The pre-filter is your system’s front-line defender, catching the big stuff before it causes trouble downstream. Because of this heavy lifting, pre-filters often need replacement sooner than the rest.
Don’t wait for problems to appear.
Be proactive about swapping pre-filters and, if possible, give them a periodic clean to extend their lifespan, but never put off replacement when it’s due. A clean pre-filter protects your RO membrane, making sure sediment doesn’t clog or damage your system.
If your water carries a lot of sediment, expect to change these filters more frequently, sometimes every 3 to 6 months.
Use Filter Replacement Schedules
Following a filter replacement schedule maintains water quality and also prevents system damage and costly repairs. We recommend setting reminders on your calendar or subscribing to auto-replacement services that deliver filters on schedule.
By following these maintenance practices, you can maximize the longevity of your RO filters and maintain water quality.
Want less hassle? Sign up for the Rayne Water VIP Program. It includes regular salt deliveries for your softener, filter changes for your RO, and provides annual preventative maintenance inspections.
Filter Quality Matters
Not all RO filters are created equal, and choosing the right one can make a major difference in how well your system performs and how long it lasts.
Why Not All Filters Are Equal
At first glance, a filter seems like a simple part swap.
But look closer, and the differences emerge. OEM filters stand apart from third-party alternatives. And while third-party options are often economical, they may not match the same performance standards or hold certifications for quality and safety.
OEM filters are crafted for your specific RO system. Designed by the original equipment makers, they undergo rigorous testing, often earning NSF certification. This ensures they remove critical contaminants like chlorine, lead, and volatile organic compounds effectively.
Many generic filters lack this validation. They fall short in filtration and lifespan. Some fail to seal properly. Others degrade quickly or let contaminants slip through, risking your water and system.
For specialty setups, like an RO fridge filter, compatibility matters. Off-brand parts falter fast. Only high-quality, system-specific filters deliver seamless performance. Glass after glass, your water meets the mark.
Trust is key for clean water. The right filter doesn’t just fit; it completes your system.
The Cost of Low-Quality Filters
A cheaper filter might seem like a good deal at first, but cutting corners can lead to reduced performance or more frequent replacements over time.
Here’s what to look out for:
More frequent replacements. Inferior filters tend to clog faster or degrade sooner. That means you’ll find yourself swapping them out more often, spending more money in the long run and never quite sure if your water is protected.
Inadequate filtration. Poor-quality filters may not effectively remove key contaminants. The result? Water that doesn’t taste right, and safety you can’t fully trust.
Damage to the RO membrane. When a cheap pre-filter lets sediment or chlorine sneak by, your RO membrane pays the price. Repairs get expensive. Sometimes, a whole new membrane is needed.
A low-quality filter is a shortcut that rarely leads to good water. Invest in certified, high-quality RO filters. Protect your water. Safeguard your system. And trust that every glass is as clean as it should be.
Monitoring Water Quality to Guide Replacements
To gauge the effectiveness of your filters, consider using water tests.
Regular testing ensures that your filters are still producing clean and safe drinking water. If test results indicate any issues, it’s time to replace the filters.
Moreover, reverse osmosis filters are a vital component of RO systems, ensuring that you have access to clean and pure drinking water.
To maintain their effectiveness, try to understand your RO system’s lifespan and follow recommended replacement schedules. Regular maintenance, monitoring, and choosing high-quality filters all contribute to their longevity.
Testing Tools and What to Look For
There are several tools available to help monitor water quality and determine when an RO filter replacement is needed.
TDS meters: These devices measure Total Dissolved Solids in your water. After passing through a functioning RO system, TDS levels should generally fall below 50 ppm. Water quality test strips: Easy to use and inexpensive, these can give you quick readings on chlorine, hardness, and pH.
Lab testing: For more precise results, especially in business or commercial settings, periodic lab analysis helps verify that your RO filters are effectively removing contaminants.
If test results show a rise in TDS or the presence of unexpected contaminants, it’s time to check your filters.
The Role of Pressure and Flow Rate
Flow rate and water pressure are key indicators to look out for. Drop in pressure may indicate that filters are blocked or the membrane is reaching the end of its life.
It’s also worth noting that other adjustable components, like the flow restrictor or auto shut-off valve, can impact performance. If there is a complete or partial stall in the flow, both the filters and these mechanical parts need to be checked first before moving on to system-level issues.
Special Considerations for RO Fridge Filters
Systems that dispense filtered water or ice from refrigerators use RO-compatible systems. These types of filters differ from standard RO systems in their design, maintenance, and performance.
Are RO Fridge Filters the Same as Regular RO?
RO fridge filters serve a similar purpose as regular RO filters, but they’re often part of more compact or inline systems built directly into refrigerator models. Many modern fridges use RO-compatible cartridges to filter water for ice and drinking dispensers, and in many cases, they connect to a larger reverse osmosis system installed under the sink.
The basic filtration process is similar, and the goal is the same: to remove impurities and improve taste. However, fridge-based systems can be limited by space and filter size, which may slightly affect filtration capacity or flow rate over time.
If you’re using a dedicated RO fridge filter, it’s important to make sure it’s compatible with your fridge model and maintains the same filtration standards as your main RO system.
Maintenance Differences
RO fridge filters typically have a shorter lifespan than standard RO filters, due to their smaller size and lower volume capacity. These filters often need to be replaced every 6 months, especially in households with high usage.
Because of their compact design, they may clog faster or show reduced flow rate sooner than under-sink systems. Keeping up with your RO filter replacement schedule is key to ensuring your fridge water and ice remain clean and great-tasting.
Always consult your refrigerator’s user manual or the filter manufacturer’s guidelines to stay on top of maintenance.
Should You Join a Maintenance Program?
If keeping track of replacement schedules, filter types, and maintenance tasks feels like a lot, you’re not alone. That’s where a professional maintenance plan can help simplify everything.
What VIP Programs Include
With a VIP maintenance program, you trade uncertainty for assurance. Your water system gets routine care, right on schedule, and you get more time for everything else.
Many providers offer VIP or scheduled maintenance programs designed to take the guesswork out of RO filter replacement and system care. These plans typically include:
Automatic filter replacements: Filters are shipped to you on time, so you never have to worry about missing a change.
Annual inspections: A technician checks your system for pressure, flow rate, membrane condition, and leaks, helping to prevent problems early.
Cost savings and peace of mind: Bundled services usually cost less than scheduling one-time replacements. You also avoid emergency service calls caused by neglected maintenance.
VIP plans are especially handy if your system has multiple filters, like an under-sink RO system and a RO fridge filter working together. Everything stays in sync, and your water stays clean.
There’s peace of mind in knowing your water system is always one step ahead.
For some, that means setting a calendar reminder. For others, a professional maintenance plan is the smarter route.
A maintenance program is especially helpful in high-demand environments or in areas where water quality is poor. You may benefit if:
You live in a region with hard water, sediment, or high chlorine levels
Your household has high water usage or many residents
You operate a business system that serves employees or customers
You share a water system in a multi-unit building or residential complex
Imagine never having to wonder if your RO filters are overdue for replacement, or if hidden buildup is slowly affecting performance. For homes and businesses, a maintenance plan keeps you on track: filters changed, inspections handled, water quality protected. No surprises. Just reliable, clean water, every day.
Is Your RO System Set Up for Peak Performance?
Understanding how long RO filters last is key to keeping your water safe, clean, and great-tasting. Each filter in your system, such as a sediment pre-filter, carbon block, RO membrane, post-filter, or RO fridge filter, has a specific lifespan and plays an important role in the filtration process.
Sticking to a regular maintenance schedule, monitoring water quality, and choosing high-quality filters are simple steps that make a big difference. These habits help protect your system and ensure consistent performance.
If you are unsure which filters your system needs or when to replace them, we are here to help. Reach out for personalized recommendations or explore our VIP maintenance program to keep your reverse osmosis system running at its best year-round.
FAQs
How often do you change reverse osmosis filters?
Noticing a decrease in water pressure, an unusual taste or odor of the water, or discolorations are all signs your RO filters need replacement. Water quality is important, so regular monitoring and following replacement schedules are necessary.
Can I extend the lifespan of my RO filters through DIY maintenance?
You can extend the lifespan of your RO filters through regular cleaning of filter housings and pre-filters. You still need to follow replacement schedules, as some filters need to be replaced after a certain period of time.
Does the quality of replacement filters matter?
It is very important that high-grade replacement filters be used, as these significantly increase the durability and performance of your reverse osmosis system. If low-grade filters are used, there will be more contaminants and hence, a higher frequency of replacement.
Are there any environmental factors that affect filter lifespan?
External factors such as temperature and humidity will have an effect on the performance of the filter. If used in extreme heat or cold, the system’s filters will wear out faster.
What’s the best way to ensure my RO system consistently provides clean water?
To guarantee that your RO system continuously provides clean water, adhere to maintenance schedules, such as replacing filters and servicing the system. Also, maintain proper servicing intervals and use reputable and high-grade filters to enhance performance. You should also keep an eye out for any changes in the water’s taste, smell, color, pressure, and think about having the water tested regularly for assurance.